



Personal Introduction
Starbucks Lemon Loaf Recipe experiments started in my kitchen after I realized I was spending way too much money grabbing slices from the coffee shop every week. It was one of those little treats I kept adding to my order without thinking about it. Then one rainy Saturday, I decided to try making it at home.
The first version honestly was not great. The loaf looked beautiful on top but ended up dry in the middle because I baked it too long while folding laundry upstairs. I also used bottled lemon juice that time, and I noticed the flavor tasted kind of flat compared to the real Starbucks version.
After a few tries though, this recipe finally became the one my family actually asks for. It has that soft, moist texture with a bright lemon flavor and thick sweet icing that cracks slightly when you slice into it. That icing part matters more than I expected.
What I like about making this at home is that it tastes fresh and homemade instead of overly processed. Plus, you can cut thick slices without paying coffee shop prices. I usually make this when I know people are coming over because the smell of lemon and vanilla baking makes the whole kitchen feel cozy.
This Starbucks Lemon Loaf Recipe has become one of those dependable baking recipes that feels impressive without actually being difficult.
Why This Recipe Works
This recipe works because the balance between the lemon flavor and the texture is right. Some lemon loaf recipes taste good but turn out dry or crumbly. Others are moist but barely taste like lemon.
The combination of sour cream, oil, and fresh lemon juice helps keep the loaf soft for several days. I noticed butter alone did not give the same moist texture that Starbucks-style lemon loaf has.
Using both lemon zest and lemon juice also makes a huge difference. The zest gives stronger lemon flavor while the juice adds freshness and brightness.
The icing is another important part of the recipe. It is thick enough to sit on top instead of soaking completely into the loaf. What worked better for me was letting the loaf cool completely before icing it. The first time I rushed it, the icing slid right off the top and pooled around the plate.
Another reason this recipe works well is that the ingredients are basic grocery store staples. No complicated baking ingredients or hard-to-find extracts.
Equipment Needed
You only need basic baking tools for this recipe:
- 9×5-inch loaf pan
- Large mixing bowl
- Medium mixing bowl
- Hand mixer or whisk
- Measuring cups and spoons
- Rubber spatula
- Cooling rack
- Knife
- Cutting board
- Zester or fine grater
- Toothpick for checking doneness
Recipe Card
Starbucks Lemon Loaf Recipe Summary
Prep Time: 18 minutes
Cook Time: 52 minutes
Total Time: 1 hour 10 minutes
Servings: 10 slices
Cuisine: American
Course: Bread
Calories: About 410 calories per slice
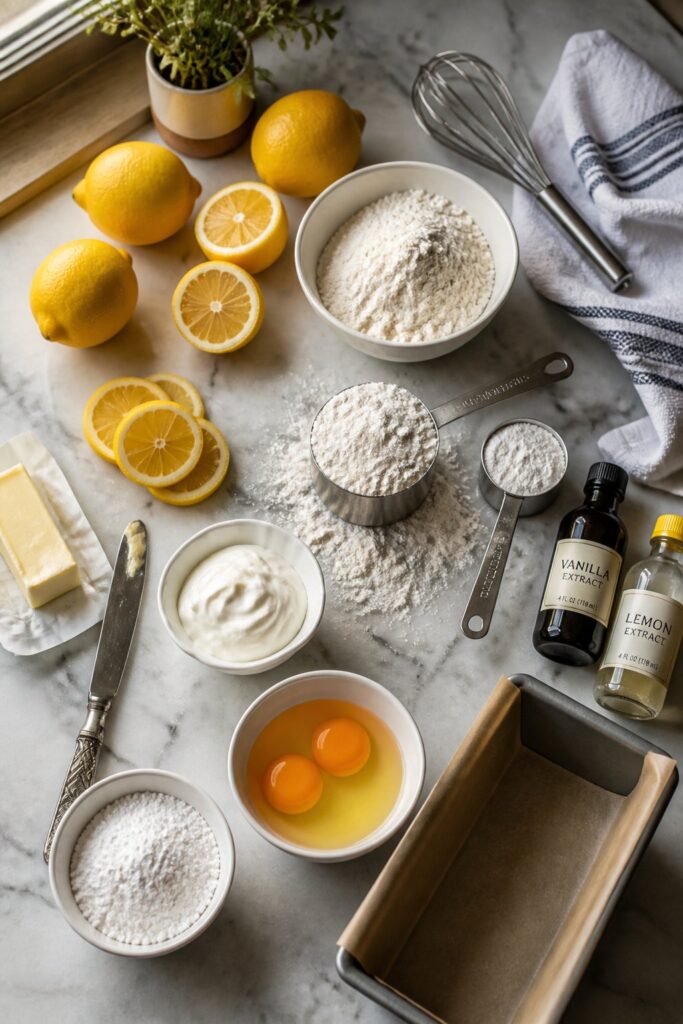
Ingredients
For the Lemon Loaf
- 1 1/2 cups all-purpose flour
- 2 tablespoons cornstarch
- 1 teaspoon baking powder
- 1/2 teaspoon baking soda
- 1/2 teaspoon salt
- 3 large eggs
- 1 cup granulated sugar
- 1/2 cup vegetable oil
- 1/2 cup sour cream
- 1/4 cup whole milk
- 2 tablespoons fresh lemon juice
- 2 tablespoons lemon zest
- 1 teaspoon vanilla extract
- 1/2 teaspoon lemon extract
For the Lemon Icing
- 1 1/2 cups powdered sugar
- 2 to 3 tablespoons fresh lemon juice
- 1 teaspoon lemon zest
Step-by-Step Instructions
Step 1: Prepare the Oven and Pan
Preheat your oven to 350 degrees Fahrenheit. Grease a 9×5-inch loaf pan well or line it with parchment paper.
I usually leave a little parchment hanging over the sides because it makes lifting the loaf out easier later. The first time I skipped that step, I ended up struggling to get the loaf out cleanly.
Step 2: Mix the Dry Ingredients
In a medium bowl, whisk together the flour, cornstarch, baking powder, baking soda, and salt.
The cornstarch helps soften the crumb a bit, which gives the loaf that bakery-style texture. It is a small thing, but I noticed the difference when I tested batches without it.
Set the dry ingredients aside.
Step 3: Mix the Wet Ingredients
In a large mixing bowl, whisk together the eggs and sugar until smooth and slightly lighter in color.
Add the vegetable oil, sour cream, milk, lemon juice, lemon zest, vanilla extract, and lemon extract. Stir until fully combined.
At this point the batter smells really lemony already, especially from the fresh zest. Fresh lemons honestly carry this whole recipe.
Step 4: Combine Wet and Dry Ingredients
Gradually add the dry ingredients into the wet mixture. Stir gently with a spatula until just combined.
Do not overmix the batter. A few small lumps are completely fine. Overmixing can make the loaf dense instead of soft.
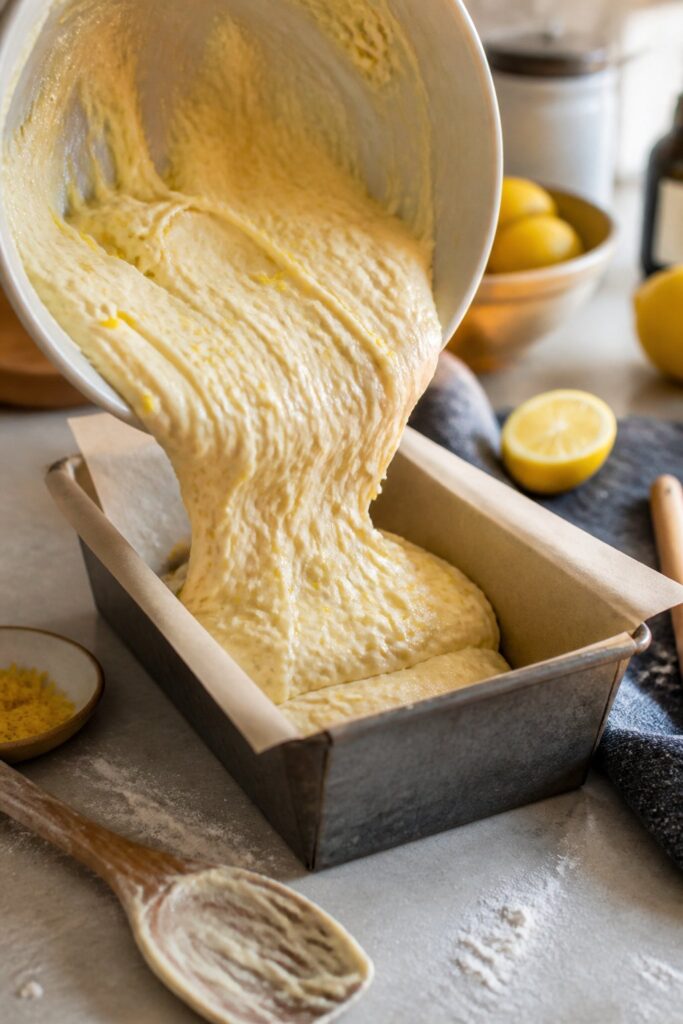
The batter should look smooth and fairly thick but still easy to pour.
Step 5: Bake the Lemon Loaf
Pour the batter into the prepared loaf pan and smooth the top gently.
Bake for 50 to 55 minutes. Around the 40-minute mark, I usually loosely place foil over the top if it looks like it is browning too quickly.
The loaf is done when the top looks golden and a toothpick inserted into the center comes out mostly clean with a few moist crumbs.
The smell during baking is honestly hard to beat. The whole kitchen smells buttery, sweet, and bright from the lemon.
Step 6: Cool the Loaf
Let the loaf cool in the pan for about 15 minutes before transferring it to a wire rack.
This part matters because the loaf is still delicate when hot. The first time I tried moving it too early, the middle cracked apart slightly.
Let it cool completely before adding icing.
Step 7: Make the Lemon Icing
In a medium bowl, whisk together the powdered sugar, lemon juice, and lemon zest until smooth.
The icing should be thick but pourable. If it seems too thin, add a little more powdered sugar. If it feels too thick, add a tiny splash of lemon juice.
I like the icing slightly thicker because it gives that classic Starbucks-style layer on top.
Step 8: Ice the Lemon Loaf
Pour the icing over the cooled loaf and let it spread naturally down the sides.
Some people like perfectly clean icing, but honestly I think slight drips down the edges make it look more homemade and inviting.
Let the icing set for about 20 minutes before slicing.
Common Mistakes to Avoid
Using Bottled Lemon Juice
Fresh lemon juice gives much brighter flavor. Bottled juice tends to taste dull and artificial in baked goods.
Overbaking the Loaf
This loaf continues cooking slightly after it comes out of the oven. Pull it once the center is just set.
Overmixing the Batter
Too much mixing develops gluten and makes the loaf heavy instead of soft.
Icing the Loaf Too Early
If the loaf is still warm, the icing melts and slides off instead of setting properly.
Forgetting the Lemon Zest
The zest provides most of the lemon flavor. The juice alone is not enough.
Pro Tips
- Use room temperature eggs for smoother batter.
- Zest the lemons before juicing them. I still forget this sometimes.
- Measure flour carefully by spooning it into the measuring cup instead of scooping directly.
- Use parchment paper for easier removal.
- Let the loaf rest overnight if possible because the lemon flavor gets even better the next day.
- Store the loaf covered so it stays moist.
- Add extra zest to the icing if you want stronger lemon flavor.

Variations
Blueberry Lemon Loaf
Fold 1 cup fresh blueberries into the batter before baking. The blueberries work really well with the lemon.
Cream Cheese Lemon Loaf
Add a thin layer of sweetened cream cheese filling in the center for a richer texture.
Mini Lemon Loaves
Divide the batter into mini loaf pans for smaller individual servings.
Lemon Poppy Seed Version
Add 1 tablespoon poppy seeds to the batter for a classic bakery variation.
Gluten-Free Version
Use a good-quality 1-to-1 gluten-free flour blend.
Extra Tangy Version
Add additional lemon zest and a tiny bit more lemon extract for stronger citrus flavor.
Serving Ideas
Here are a few simple ways to serve this Starbucks Lemon Loaf Recipe:
- Serve with hot coffee or iced coffee
- Add fresh berries on the side
- Pair with hot tea in the afternoon
- Warm slices slightly before serving
- Add whipped cream for dessert
- Serve with vanilla yogurt at breakfast
- Enjoy with iced lemonade during summer
Make-Ahead Tips
This loaf actually tastes even better after sitting for a few hours because the lemon flavor settles into the cake.
You can bake the loaf one day ahead and add the icing the next morning if needed.
I usually wrap the cooled loaf tightly in plastic wrap overnight before icing it. That helps trap moisture and keeps the texture soft.
The icing can also be mixed ahead and refrigerated separately. Just stir it again before using.
Storage & Reheating Tips
Store the loaf in an airtight container at room temperature for up to 3 days.
For longer storage, refrigerate it for up to 1 week. I noticed the texture stays softer if you let refrigerated slices sit at room temperature for about 15 minutes before eating.
You can also freeze individual slices wrapped tightly in plastic wrap and foil.
I do not usually microwave this loaf because the icing can melt strangely. Room temperature honestly tastes best.

FAQs
Does this really taste like Starbucks lemon loaf?
Yes, it is very close. The texture is soft and moist with strong lemon flavor and sweet icing just like the coffee shop version.
Can I use Greek yogurt instead of sour cream?
Yes. Full-fat plain Greek yogurt works well and keeps the loaf moist.
Why is my lemon loaf dry?
Usually from overbaking or adding too much flour. Measuring flour carefully helps a lot.
Can I freeze lemon loaf?
Yes. Wrap slices tightly and freeze for up to 2 months.
What does lemon extract do?
It boosts the lemon flavor without adding extra liquid to the batter.
Can I make this without icing?
You can, but the icing really gives it that Starbucks-style flavor and sweetness.
More Helpful Notes from My Kitchen
One thing I learned after making this Starbucks Lemon Loaf Recipe several times is that lemon flavor can vary a lot depending on the lemons themselves.
Some lemons are sweeter while others are more tart. I usually taste the juice before adding it just to get an idea of how bright the flavor will be.
I also noticed this loaf slices more cleanly after fully cooling. Warm slices taste good too, but the texture sets up much better later.
Another small thing that helped was using a light-colored metal loaf pan instead of a dark one. Dark pans tend to brown the edges faster.
Sometimes I make extra icing because my family likes thicker glaze on top. Nobody has complained about extra icing yet.
Why Sour Cream Makes a Difference
Sour cream helps create the soft texture that makes this loaf feel bakery-style instead of homemade in a dry way.
I tried replacing it completely with milk once, and the loaf turned out noticeably less moist.
The slight tang from sour cream also balances the sweetness nicely.
Full-fat sour cream works best here. Reduced-fat versions can change the texture slightly.
Budget-Friendly Baking Tips
Fresh lemons are usually cheaper when bought in small bags instead of individually.
I also use store-brand flour and sugar for this recipe without any issues.
If lemon extract feels expensive, you can still make the recipe without it. The flavor just will not be quite as strong.
Making this loaf at home honestly saves a surprising amount compared to buying slices from coffee shops.
How to Make It Feel Bakery-Style at Home
For that coffee shop look, let the icing drip naturally over the edges instead of spreading it perfectly.
Use extra lemon zest on top right before the icing sets. It makes the loaf look fresher and adds more lemon aroma.
I also like serving slices on small plates with coffee because it feels a little more special even though it is just homemade loaf cake.
The first time I brought this to a brunch gathering, people genuinely thought it came from an actual bakery.
Final Thoughts
This Starbucks Lemon Loaf Recipe is one of those recipes that feels comforting, simple, and worth making again.
It has the soft texture, bright lemon flavor, and sweet icing that people love from the coffee shop version, but it tastes fresher and more homemade.
What I like most is that the ingredients are basic and the steps are straightforward. You do not need advanced baking skills to make something that looks and tastes impressive.
I still make little tweaks depending on how lemony I want it or how thick I want the icing, and that flexibility makes it feel like a real home baking recipe instead of something overly strict.
If you try this Starbucks Lemon Loaf Recipe, do not stress over making it look perfect

Starbucks Lemon Loaf Recipe

Equipment
- 9×5 inch loaf pan
- Large mixing bowl
- Medium mixing bowl
- Hand mixer or whisk
- Measuring cups and spoons
- Rubber spatula
- Cooling rack
- Knife
- Cutting board
- Zester or fine grater
- Toothpick for checking doneness
Ingredients
For the Lemon Loaf
- 1 1/2 cups all-purpose flour
- 2 tablespoons cornstarch
- 1 teaspoon baking powder
- 1/2 teaspoon baking soda
- 1/2 teaspoon salt
- 3 large eggs
- 1 cup granulated sugar
- 1/2 cup vegetable oil
- 1/2 cup sour cream
- 1/4 cup whole milk
- 2 tablespoons fresh lemon juice
- 2 tablespoons lemon zest
- 1 teaspoon vanilla extract
- 1/2 teaspoon lemon extract
For the Lemon Icing
- 1 1/2 cups powdered sugar
- 2 to 3 tablespoons fresh lemon juice
- 1 teaspoon lemon zest
Instructions
Step 1: Prepare the Oven and Pan
- Preheat your oven to 350 degrees Fahrenheit. Grease a 9×5-inch loaf pan well or line it with parchment paper.
- I usually leave a little parchment hanging over the sides because it makes lifting the loaf out easier later. The first time I skipped that step, I ended up struggling to get the loaf out cleanly.
Step 2: Mix the Dry Ingredients
- In a medium bowl, whisk together the flour, cornstarch, baking powder, baking soda, and salt.
- The cornstarch helps soften the crumb a bit, which gives the loaf that bakery-style texture. It is a small thing, but I noticed the difference when I tested batches without it.
- Set the dry ingredients aside.
Step 3: Mix the Wet Ingredients
- In a large mixing bowl, whisk together the eggs and sugar until smooth and slightly lighter in color.
- Add the vegetable oil, sour cream, milk, lemon juice, lemon zest, vanilla extract, and lemon extract. Stir until fully combined.
- At this point the batter smells really lemony already, especially from the fresh zest. Fresh lemons honestly carry this whole recipe.
Step 4: Combine Wet and Dry Ingredients
- Gradually add the dry ingredients into the wet mixture. Stir gently with a spatula until just combined.
- Do not overmix the batter. A few small lumps are completely fine. Overmixing can make the loaf dense instead of soft.
- The batter should look smooth and fairly thick but still easy to pour.
Step 5: Bake the Lemon Loaf
- Pour the batter into the prepared loaf pan and smooth the top gently.
- Bake for 50 to 55 minutes. Around the 40-minute mark, I usually loosely place foil over the top if it looks like it is browning too quickly.
- The loaf is done when the top looks golden and a toothpick inserted into the center comes out mostly clean with a few moist crumbs.
- The smell during baking is honestly hard to beat. The whole kitchen smells buttery, sweet, and bright from the lemon.
Step 6: Cool the Loaf
- Let the loaf cool in the pan for about 15 minutes before transferring it to a wire rack.
- This part matters because the loaf is still delicate when hot. The first time I tried moving it too early, the middle cracked apart slightly.
- Let it cool completely before adding icing.
Step 7: Make the Lemon Icing
- In a medium bowl, whisk together the powdered sugar, lemon juice, and lemon zest until smooth.
- The icing should be thick but pourable. If it seems too thin, add a little more powdered sugar. If it feels too thick, add a tiny splash of lemon juice.
- I like the icing slightly thicker because it gives that classic Starbucks-style layer on top.
Step 8: Ice the Lemon Loaf
- Pour the icing over the cooled loaf and let it spread naturally down the sides.
- Some people like perfectly clean icing, but honestly I think slight drips down the edges make it look more homemade and inviting.
- Let the icing set for about 20 minutes before slicing.
Notes
- Use room temperature eggs for smoother batter.
- Zest the lemons before juicing them. I still forget this sometimes.
- Measure flour carefully by spooning it into the measuring cup instead of scooping directly.
- Use parchment paper for easier removal.
- Let the loaf rest overnight if possible because the lemon flavor gets even better the next day.
- Store the loaf covered so it stays moist.
- Add extra zest to the icing if you want stronger lemon flavor.
