


Personal Introduction
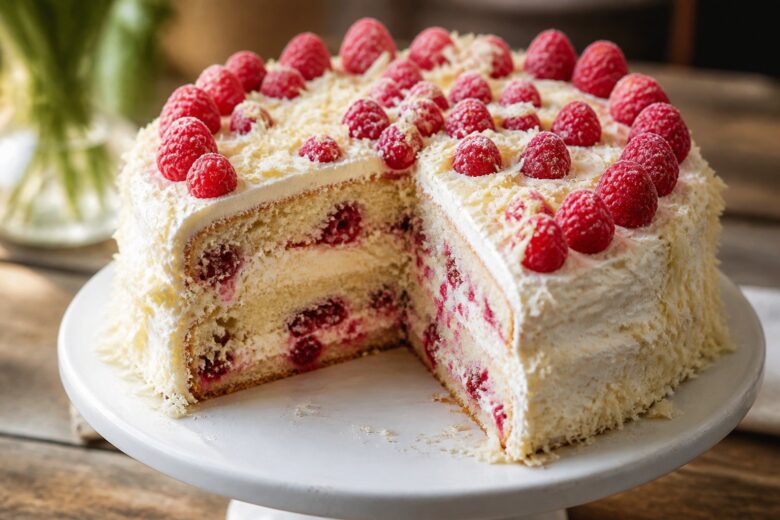
The first time I made this Mary Berry White Chocolate and Raspberry Cake, I was honestly nervous about it. White chocolate can be a little tricky sometimes, and I’ve had cakes in the past turn out way too sweet or too dense. But this one surprised me in the best way.
I made it for a family birthday dinner after spotting a version of it online late one night while looking for something that felt a little special but still homemade. I didn’t want one of those bakery-style cakes that looks beautiful but tastes dry after two bites.
What I noticed right away with this cake was how soft the layers stayed, even the next day. The raspberries cut through the sweetness from the white chocolate so the whole thing tasted balanced instead of heavy.
The first time I made it, I actually overmixed the batter a little and worried I ruined it. Somehow it still came out soft and fluffy. Since then, I’ve made a few small tweaks that worked better for me, especially chilling the frosting slightly before spreading it.
Now this Mary Berry White Chocolate and Raspberry Cake is one of my favorite cakes for spring and summer gatherings. It feels fancy enough for birthdays or baby showers, but it’s still simple enough to make in a regular home kitchen without stressing yourself out.
Why This Recipe Works
There are a few reasons this cake turns out so good.
First, the raspberries balance the sweetness from the white chocolate. White chocolate on its own can sometimes taste almost too rich, but the berries keep everything fresh.
The cake layers also stay really moist because of the butter and milk in the batter. Some sponge cakes dry out fast, especially after refrigeration, but this one holds up surprisingly well.
Another thing I like is the texture contrast. The smooth frosting, soft cake, and little bursts of raspberry make each bite feel more interesting.
I noticed that using real white chocolate instead of cheap baking chips also makes a huge difference. The flavor tastes creamier and less sugary.
And honestly, this Mary Berry White Chocolate and Raspberry Cake looks impressive without requiring professional decorating skills.
Equipment Needed
You don’t need fancy baking equipment for this recipe.
- Mixing bowls
- Hand mixer or wooden spoon
- Measuring cups
- Measuring spoons
- 2 round cake pans
- Rubber spatula
- Cooling rack
- Knife
- Cutting board
- Small saucepan
- Offset spatula or butter knife
I still use the same basic cake pans I bought years ago at Target.
Recipe Card
Mary Berry White Chocolate and Raspberry Cake Summary
- Prep Time: 28 minutes
- Cook Time: 32 minutes
- Total Time: 1 hour
- Servings: 10 slices
- Cuisine: British-American
- Course: Dessert
- Calories: Approximately 520 calories per slice
Ingredients
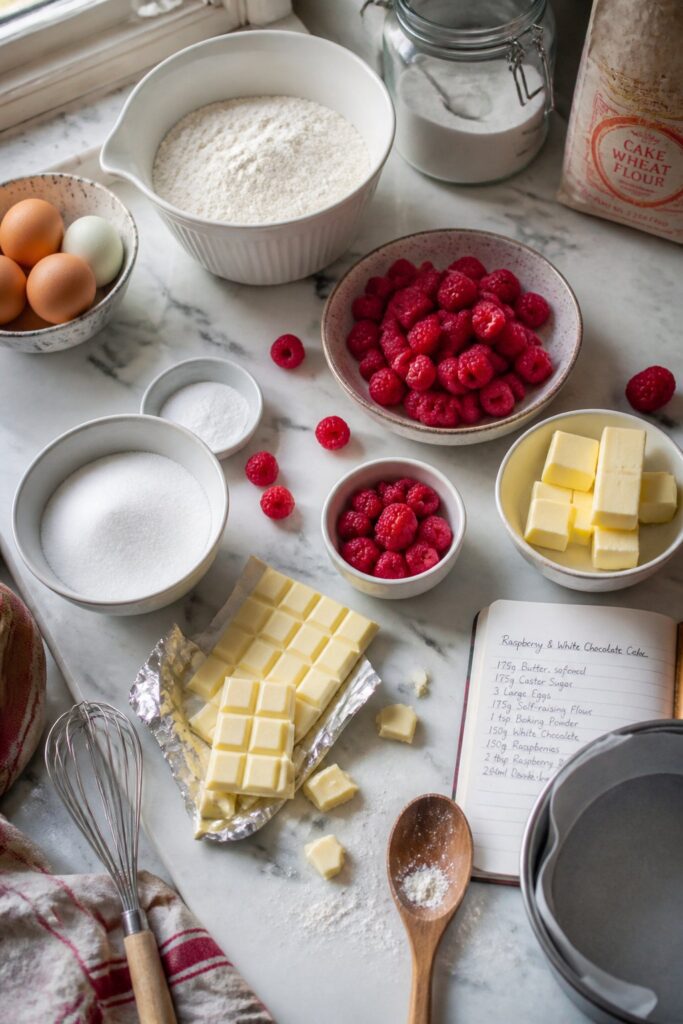
For the Cake Layers
- 2 1/2 cups all-purpose flour
- 2 teaspoons baking powder
- 1/2 teaspoon salt
- 1 cup unsalted butter, softened
- 1 3/4 cups granulated sugar
- 4 large eggs
- 1 teaspoon vanilla extract
- 3/4 cup whole milk
- 6 oz white chocolate, melted and slightly cooled
- 1 1/2 cups fresh raspberries
For the White Chocolate Frosting
- 1 cup unsalted butter, softened
- 3 cups powdered sugar
- 5 oz white chocolate, melted and cooled
- 2 tablespoons heavy cream
- 1 teaspoon vanilla extract
For Decoration
- Extra raspberries
- White chocolate shavings
- Powdered sugar (optional)
Step-by-Step Instructions
Step 1: Prepare the Cake Pans
Preheat your oven to 350 degrees Fahrenheit. Grease two 8-inch round cake pans and line the bottoms with parchment paper.
I used to skip parchment paper because I thought greasing the pans was enough, but one time half my cake stuck to the bottom and completely fell apart. Since then, I always use parchment.
Set the prepared pans aside while you make the batter.
Step 2: Mix the Dry Ingredients
In a medium mixing bowl, whisk together the flour, baking powder, and salt.
You don’t need to overdo the whisking here. Just make sure the baking powder is evenly mixed so the cake rises properly.
The flour mixture should look light and evenly combined without lumps.
Step 3: Cream the Butter and Sugar
In a large bowl, beat the softened butter and sugar together using a hand mixer for about 3 to 4 minutes.
The mixture should become lighter in color and fluffy-looking. If the butter still looks chunky, keep mixing a little longer.
The first time I made this Mary Berry White Chocolate and Raspberry Cake, my butter was still slightly cold and the batter looked weirdly grainy. Letting the butter soften properly really helps.
Step 4: Add the Eggs and Vanilla
Add the eggs one at a time, mixing after each addition. Then stir in the vanilla extract.
If the batter looks slightly curdled at this stage, don’t panic. Mine usually does a little, especially during colder months. Once the flour goes in, it smooths back out.
The batter should smell rich and buttery at this point.
Step 5: Add the Melted White Chocolate
Slowly pour the melted white chocolate into the batter while mixing on low speed.
Make sure the chocolate is not hot. Warm is okay, but hot chocolate can scramble the eggs or melt the butter too much.
I noticed that using good-quality white chocolate makes the flavor taste smoother and less sugary.
Step 6: Add the Dry Ingredients and Milk
Add half the flour mixture into the batter and mix gently. Pour in the milk, then add the remaining flour mixture.
Mix just until combined. Overmixing can make the cake dense.
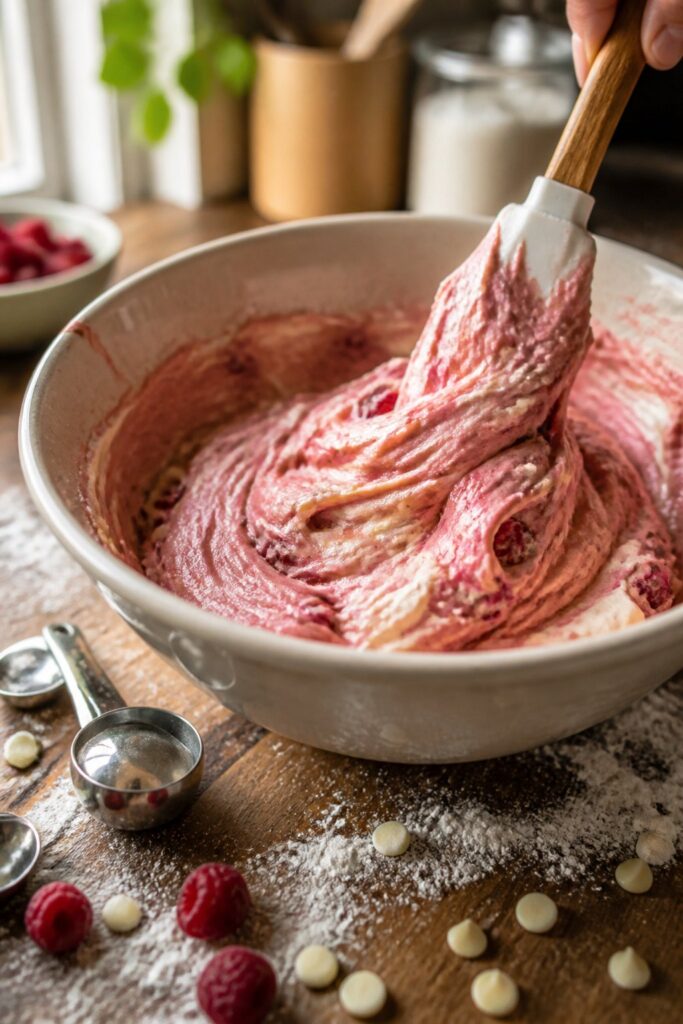
The batter should look thick, creamy, and smooth.
Step 7: Fold in the Raspberries
Gently fold the raspberries into the batter using a spatula.
Try not to crush them too much. A few streaks of raspberry are fine though. Actually, I kind of like the little swirls because they make the cake look homemade.
Fresh raspberries work best because frozen ones release more moisture.
Step 8: Bake the Cakes
Divide the batter evenly between the prepared pans.
Bake for 30 to 32 minutes or until the tops are lightly golden and a toothpick inserted into the center comes out mostly clean.
Your kitchen will smell buttery and sweet while these bake.
The cake tops should spring back lightly when touched.
Step 9: Cool the Cakes
Let the cakes cool in the pans for about 10 minutes.
Then carefully transfer them to a cooling rack to cool completely.
Do not frost warm cakes. I made that mistake once and the frosting slid everywhere.
Step 10: Make the Frosting
In a large bowl, beat the softened butter until creamy.
Add the powdered sugar gradually, then mix in the melted white chocolate, heavy cream, and vanilla extract.
The frosting should become smooth and fluffy after a few minutes.
If it feels too soft, chill it in the refrigerator for 15 minutes before frosting the cake.
What worked better for me was slightly cooling the frosting first because white chocolate frosting can get loose pretty quickly.
Step 11: Assemble the Cake
Place one cake layer onto a serving plate.
Spread a thick layer of frosting over the top, then add a small handful of fresh raspberries.
Place the second cake layer on top and frost the top and sides.
Don’t stress about making it perfectly smooth. Slightly messy homemade frosting honestly looks more inviting sometimes.
Step 12: Decorate and Serve
Top the cake with extra raspberries and white chocolate shavings.
You can dust a little powdered sugar on top if you want a softer bakery-style look.
Slice and serve once the frosting has set slightly.
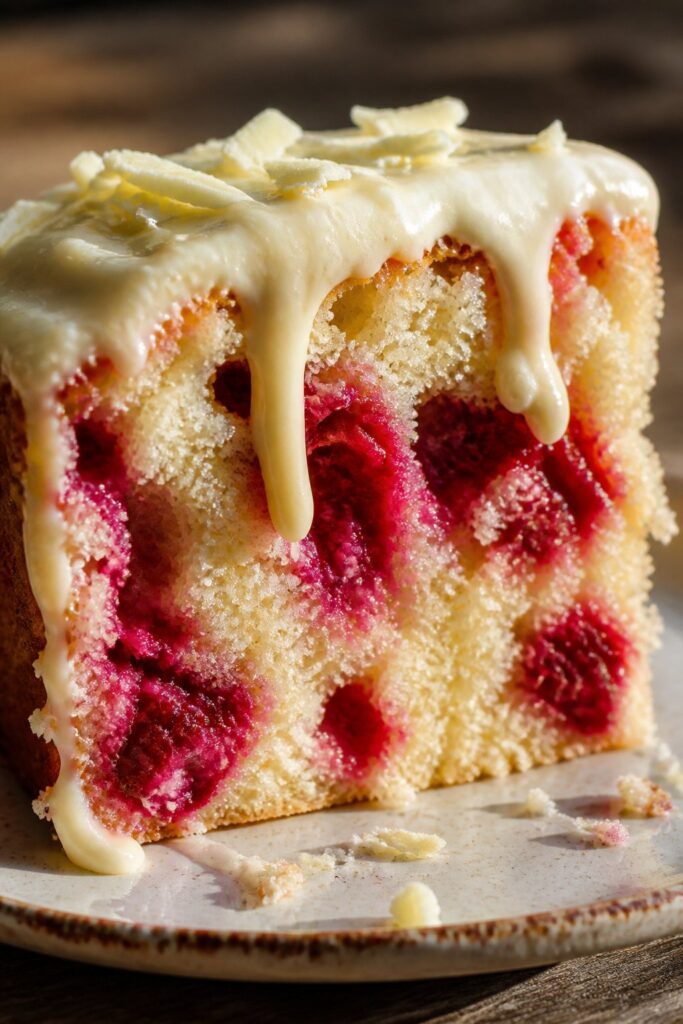
The texture should be soft, creamy, and slightly fruity with little bursts of raspberry in each bite.
Common Mistakes to Avoid
Using Hot White Chocolate
If the melted chocolate is too hot, it can ruin the batter texture.
Overmixing the Batter
Too much mixing can make the cake dense instead of fluffy.
Frosting Warm Cake Layers
Warm cake melts the frosting fast. Let the layers cool completely first.
Using Watery Frozen Raspberries
Frozen berries release extra liquid and can affect the cake texture.
Adding Too Many Raspberries
Too many berries can make the center sink slightly.
I definitely learned this one the hard way after getting a little overconfident with the raspberries.
Pro Tips
- Use room temperature ingredients for smoother batter.
- Chill the frosting briefly before spreading.
- Use a serrated knife for cleaner slices.
- Wipe the knife between slices for prettier presentation.
- Add raspberries on top right before serving so they stay fresh-looking.
- Use good-quality white chocolate bars instead of chips.
One thing I noticed is that the cake flavor actually gets even better after sitting overnight in the fridge.
Variations
Lemon Raspberry Version
Add 1 tablespoon lemon zest to the batter for a brighter flavor.
White Chocolate Cupcakes
Turn the batter into cupcakes and bake for about 18 to 20 minutes.
Mixed Berry Cake
Use blueberries and raspberries together.
Almond Version
Add 1/2 teaspoon almond extract for a slightly nuttier flavor.
Naked Cake Style
Use less frosting on the sides for a rustic bakery-style look.
I made the naked version once for Easter brunch and honestly liked how casual it looked.
Serving Ideas
This Mary Berry White Chocolate and Raspberry Cake goes really well with simple drinks and lighter sides.
Some good serving ideas are:
- Hot coffee
- Earl Grey tea
- Iced coffee
- Fresh berries
- Vanilla ice cream
- Whipped cream
- Sparkling lemonade
- Hot tea
- Strawberry sauce
I usually serve this cake chilled because the frosting tastes creamier that way.
Make-Ahead Tips
This cake actually works really well for making ahead.
You can bake the cake layers a full day early and wrap them tightly in plastic wrap once cooled.
The frosting can also be made ahead and stored in the refrigerator.
Before frosting, let the frosting sit at room temperature for about 20 minutes so it spreads more easily.
I noticed that fully assembling the cake the night before serving gives the flavors more time to settle together.
Storage & Reheating Tips
Refrigerator Storage
Store the cake covered in the refrigerator for up to 4 days.
Because of the frosting and fresh berries, refrigeration works best.
Freezing
You can freeze unfrosted cake layers for up to 2 months.
Wrap them tightly in plastic wrap and then foil.
Serving After Refrigeration
Let slices sit at room temperature for about 15 minutes before serving.
Cold cake straight from the fridge can feel slightly firm.
Avoid Freezing Fresh Raspberries on Top
The fresh garnish becomes mushy after thawing.
FAQs
Can I use frozen raspberries?
Yes, but fresh raspberries work better because frozen berries release more moisture.
What type of white chocolate works best?
Use baking bars or good-quality white chocolate instead of candy melts or cheap chips.
Can I make this cake ahead of time?
Absolutely. The flavor actually improves after chilling overnight.
Why did my cake sink in the middle?
Usually this happens from overmixing the batter or adding too many raspberries.
Does this cake need refrigeration?
Yes. Because of the frosting and fresh fruit, refrigeration is recommended.
Can I turn this recipe into cupcakes?
Yes. Bake cupcakes for about 18 to 20 minutes.
More Helpful Notes From My Kitchen
After making this Mary Berry White Chocolate and Raspberry Cake several times, I noticed little details that make a surprisingly big difference.
For example, raspberries break apart faster than you think once mixed into batter. Folding gently really matters if you want those pretty berry pockets throughout the cake.
I also tested this recipe once using low-fat milk because that was all I had at home. It still worked, but whole milk definitely made the cake softer.
Another thing is the frosting thickness. White chocolate frosting can go from perfect to overly soft pretty quickly depending on room temperature. During summer, I usually chill the bowl halfway through frosting.
One accidental discovery happened when I added a few crushed freeze-dried raspberries on top for decoration. It actually looked really pretty and added extra raspberry flavor.
If you like less sweet desserts, you can slightly reduce the powdered sugar in the frosting. White chocolate already adds sweetness naturally.
Hosting Tips for Serving This Cake
This cake works especially well for birthdays, brunches, baby showers, and spring dinners.
When I serve it for gatherings, I usually decorate it right before guests arrive so the berries stay bright and fresh-looking.
A few foods that pair nicely with it are:
- Fruit salad
- Tea sandwiches
- Quiche
- Lemon bars
- Shortbread cookies
- Fresh whipped cream
The raspberry flavor keeps the cake from feeling too heavy after bigger meals.
One time I brought this Mary Berry White Chocolate and Raspberry Cake to a family cookout where everyone expected chocolate cake. By the end of the night there wasn’t a single slice left.
Ingredient Breakdown
White Chocolate
White chocolate gives the cake richness and a creamy flavor.
Raspberries
Raspberries add tartness and freshness that balance the sweetness.
Butter
Butter keeps the cake moist and flavorful.
Flour
All-purpose flour gives the cake structure while still keeping it soft.
Heavy Cream
Heavy cream helps create a smoother frosting texture.
Tips for Decorating the Cake
You do not need professional decorating skills for this cake.
Here are a few easy decorating ideas:
- Add fresh raspberries in the center
- Sprinkle white chocolate curls on top
- Dust lightly with powdered sugar
- Pipe simple frosting swirls around the edge
- Add mint leaves for color
Honestly, slightly uneven homemade frosting makes the cake feel more real and homemade.
The first time I made this cake, my frosting wasn’t smooth at all, but everyone still loved it.
Why People Love This Mary Berry White Chocolate and Raspberry Cake
I think people love this cake because it tastes rich without being overwhelming.
The raspberries cut through the sweetness enough that you can actually finish a whole slice without feeling overloaded.
Another reason this Mary Berry White Chocolate and Raspberry Cake stands out is the texture. The cake layers stay soft while the frosting feels creamy and smooth.
It also looks impressive without requiring advanced baking skills.
A lot of homemade cakes either taste amazing but look messy, or look beautiful and taste dry. This one somehow manages both.
And honestly, the flavor combination just works. White chocolate and raspberries are one of those pairings that feel classic but still exciting.
Final Thoughts
This Mary Berry White Chocolate and Raspberry Cake has become one of my favorite homemade dessert recipes because it feels special without being overly complicated.
I love how the tart raspberries balance the creamy sweetness from the white chocolate. The texture stays soft, the frosting tastes rich, and the whole cake looks impressive even with simple decorating.
The first time I served it, I honestly expected leftovers for the next day. Instead, everybody kept going back for another slice.
If you try this recipe, don’t worry about making it look perfect. Homemade cakes are supposed to have a little personality.
And if your frosting gets slightly uneven or a raspberry breaks apart while decorating, trust me, nobody will care once they taste it.
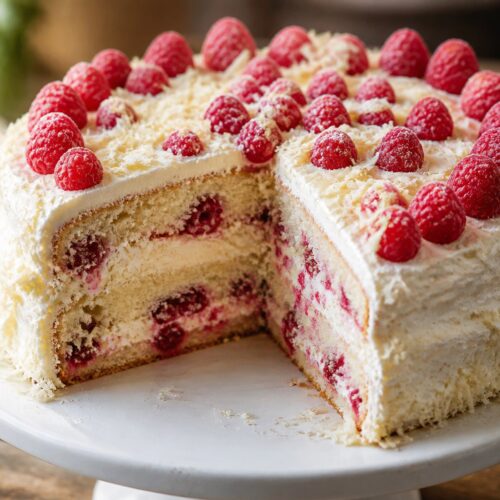
Mary Berry White Chocolate and Raspberry Cake

Equipment
- Mixing bowls
- Hand mixer or wooden spoon
- Measuring cups
- Measuring spoons
- 2 round cake pans
- Rubber spatula
- Cooling rack
- Knife
- Cutting board
- Small saucepan
- Offset spatula or butter knife
Ingredients
For the Cake Layers
- 2 1/2 cups all-purpose flour
- 2 teaspoons baking powder
- 1/2 teaspoon salt
- 1 cup unsalted butter softened
- 1 3/4 cups granulated sugar
- 4 large eggs
- 1 teaspoon vanilla extract
- 3/4 cup whole milk
- 6 oz white chocolate melted and slightly cooled
- 1 1/2 cups fresh raspberries
For the White Chocolate Frosting
- 1 cup unsalted butter softened
- 3 cups powdered sugar
- 5 oz white chocolate melted and cooled
- 2 tablespoons heavy cream
- 1 teaspoon vanilla extract
For Decoration
- Extra raspberries
- White chocolate shavings
- Powdered sugar optional
Instructions
Step 1: Prepare the Cake Pans
- Preheat your oven to 350 degrees Fahrenheit. Grease two 8-inch round cake pans and line the bottoms with parchment paper.
- I used to skip parchment paper because I thought greasing the pans was enough, but one time half my cake stuck to the bottom and completely fell apart. Since then, I always use parchment.
- Set the prepared pans aside while you make the batter.
Step 2: Mix the Dry Ingredients
- In a medium mixing bowl, whisk together the flour, baking powder, and salt.
- You don’t need to overdo the whisking here. Just make sure the baking powder is evenly mixed so the cake rises properly.
- The flour mixture should look light and evenly combined without lumps.
Step 3: Cream the Butter and Sugar
- In a large bowl, beat the softened butter and sugar together using a hand mixer for about 3 to 4 minutes.
- The mixture should become lighter in color and fluffy-looking. If the butter still looks chunky, keep mixing a little longer.
- The first time I made this Mary Berry White Chocolate and Raspberry Cake, my butter was still slightly cold and the batter looked weirdly grainy. Letting the butter soften properly really helps.
Step 4: Add the Eggs and Vanilla
- Add the eggs one at a time, mixing after each addition. Then stir in the vanilla extract.
- If the batter looks slightly curdled at this stage, don’t panic. Mine usually does a little, especially during colder months. Once the flour goes in, it smooths back out.
- The batter should smell rich and buttery at this point.
Step 5: Add the Melted White Chocolate
- Slowly pour the melted white chocolate into the batter while mixing on low speed.
- Make sure the chocolate is not hot. Warm is okay, but hot chocolate can scramble the eggs or melt the butter too much.
- I noticed that using good-quality white chocolate makes the flavor taste smoother and less sugary.
Step 6: Add the Dry Ingredients and Milk
- Add half the flour mixture into the batter and mix gently. Pour in the milk, then add the remaining flour mixture.
- Mix just until combined. Overmixing can make the cake dense.
- The batter should look thick, creamy, and smooth.
Step 7: Fold in the Raspberries
- Gently fold the raspberries into the batter using a spatula.
- Try not to crush them too much. A few streaks of raspberry are fine though. Actually, I kind of like the little swirls because they make the cake look homemade.
- Fresh raspberries work best because frozen ones release more moisture.
Step 8: Bake the Cakes
- Divide the batter evenly between the prepared pans.
- Bake for 30 to 32 minutes or until the tops are lightly golden and a toothpick inserted into the center comes out mostly clean.
- Your kitchen will smell buttery and sweet while these bake.
- The cake tops should spring back lightly when touched.
Step 9: Cool the Cakes
- Let the cakes cool in the pans for about 10 minutes.
- Then carefully transfer them to a cooling rack to cool completely.
- Do not frost warm cakes. I made that mistake once and the frosting slid everywhere.
Step 10: Make the Frosting
- In a large bowl, beat the softened butter until creamy.
- Add the powdered sugar gradually, then mix in the melted white chocolate, heavy cream, and vanilla extract.
- The frosting should become smooth and fluffy after a few minutes.
- If it feels too soft, chill it in the refrigerator for 15 minutes before frosting the cake.
- What worked better for me was slightly cooling the frosting first because white chocolate frosting can get loose pretty quickly.
Step 11: Assemble the Cake
- Place one cake layer onto a serving plate.
- Spread a thick layer of frosting over the top, then add a small handful of fresh raspberries.
- Place the second cake layer on top and frost the top and sides.
- Don’t stress about making it perfectly smooth. Slightly messy homemade frosting honestly looks more inviting sometimes.
Step 12: Decorate and Serve
- Top the cake with extra raspberries and white chocolate shavings.
- You can dust a little powdered sugar on top if you want a softer bakery-style look.
- Slice and serve once the frosting has set slightly.
- The texture should be soft, creamy, and slightly fruity with little bursts of raspberry in each bite.
Notes
- Use room temperature ingredients for smoother batter.
- Chill the frosting briefly before spreading.
- Use a serrated knife for cleaner slices.
- Wipe the knife between slices for prettier presentation.
- Add raspberries on top right before serving so they stay fresh-looking.
- Use good-quality white chocolate bars instead of chips.
