Personal Introduction
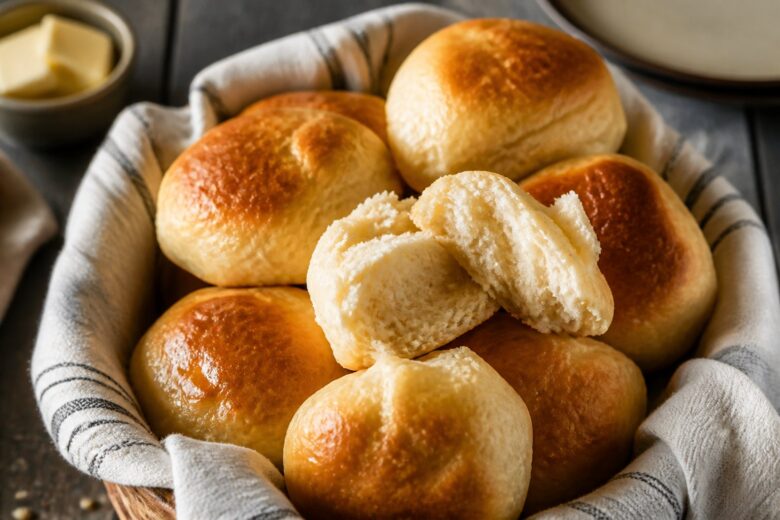
The first time I made this Ozzie Rolls Recipe, I honestly underestimated how fast homemade rolls disappear from the dinner table. I pulled the tray out of the oven, brushed the tops with butter, turned around for maybe two minutes, and somehow three rolls were already gone.
There’s something about warm homemade bread that makes people hover around the kitchen. The smell alone gets everyone asking when dinner’s ready.
I started making these rolls because I wanted something soft and buttery like the classic steakhouse-style rolls you get at restaurants. After a few batches and one slightly disastrous attempt with too much flour, this version finally turned out the way I wanted.
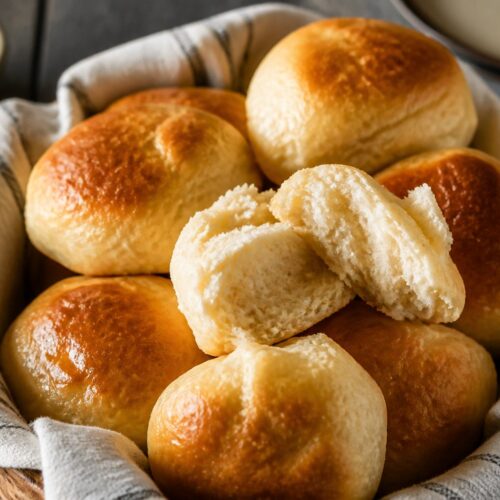
The texture is soft in the middle with lightly golden tops, and the flavor stays buttery without being overly sweet.
I noticed these rolls also stay softer the next day compared to a lot of homemade bread recipes I’ve tried.
And honestly, even when they come out a little uneven shaped, people still grab seconds.
Why This Recipe Works
There are a few practical reasons these rolls turn out so good.
- Warm milk helps create softer bread texture.
- Butter adds richness without making the dough heavy.
- A little sugar helps activate the yeast and adds balanced flavor.
- Bread flour gives the rolls better structure while staying fluffy.
- Brushing melted butter on top keeps the crust soft.
- Proper rising time creates lighter rolls instead of dense bread.
What worked better for me was adding flour gradually instead of dumping everything in at once.
This Ozzie Rolls Recipe also works because the ingredients are simple and easy to find.
Equipment Needed
You only need basic home baking tools.
- Large mixing bowl
- Measuring cups
- Measuring spoons
- Wooden spoon or spatula
- Baking dish or baking sheet
- Pastry brush
- Clean kitchen towel
- Knife or dough scraper
- Small saucepan or microwave-safe bowl
The first time I made these, I used a pan that was too small and the rolls baked together into one giant bread blob.
Recipe Card
Ozzie Rolls Recipe Summary
- Prep Time: 25 minutes
- Rise Time: 1 hour 30 minutes
- Cook Time: 18 minutes
- Total Time: 2 hours 13 minutes
- Servings: 12 rolls
- Cuisine: American
- Course: Bread
- Calories: Approximately 220 calories per roll
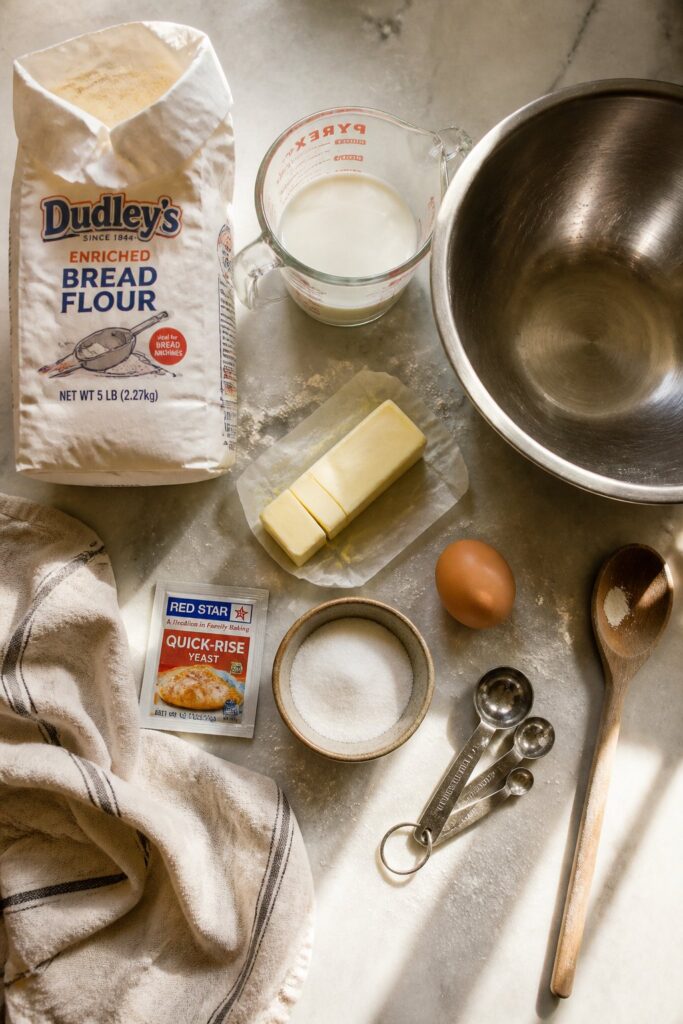
Ingredients
- 1 cup whole milk
- 1/4 cup warm water
- 2 1/4 teaspoons active dry yeast
- 1/4 cup granulated sugar
- 1/4 cup unsalted butter, melted
- 1 teaspoon salt
- 1 large egg
- 3 1/2 to 4 cups bread flour
- 2 tablespoons melted butter for brushing tops
Optional Additions
- Honey butter
- Garlic butter topping
- Flaky sea salt
- Fresh rosemary
Step-by-Step Instructions
Step 1: Activate the Yeast
Warm the milk slightly until it feels warm but not hot.
In a large mixing bowl, combine the warm water, yeast, and sugar.
Let it sit for about 5 to 10 minutes.
The mixture should look foamy on top.
If nothing happens, the yeast may be expired.
The first time I made this Ozzie Rolls Recipe, my milk was too hot and completely killed the yeast.
Step 2: Add Wet Ingredients
Stir the warm milk, melted butter, egg, and salt into the yeast mixture.
Mix until everything looks combined.
The mixture should smell slightly sweet and buttery.
Step 3: Add the Flour
Start adding the bread flour one cup at a time.
Stir after each addition.
Once the dough becomes too thick for a spoon, use your hands.
The dough should feel soft and slightly tacky but not sticky enough to coat your fingers heavily.
I noticed adding flour slowly prevents the dough from becoming too dry.
Step 4: Knead the Dough
Transfer the dough onto a lightly floured surface.
Knead for about 8 minutes.
The dough should become smoother and more elastic.
If it sticks too much, sprinkle a tiny bit more flour.
Try not to overload the dough with flour because dense rolls are disappointing.
Step 5: First Rise
Place the dough into a lightly greased bowl.
Cover with a clean kitchen towel.
Let it rise in a warm spot for about 1 hour or until doubled in size.
I usually place mine near the stove if the kitchen feels chilly.
The dough should look puffed up and soft.
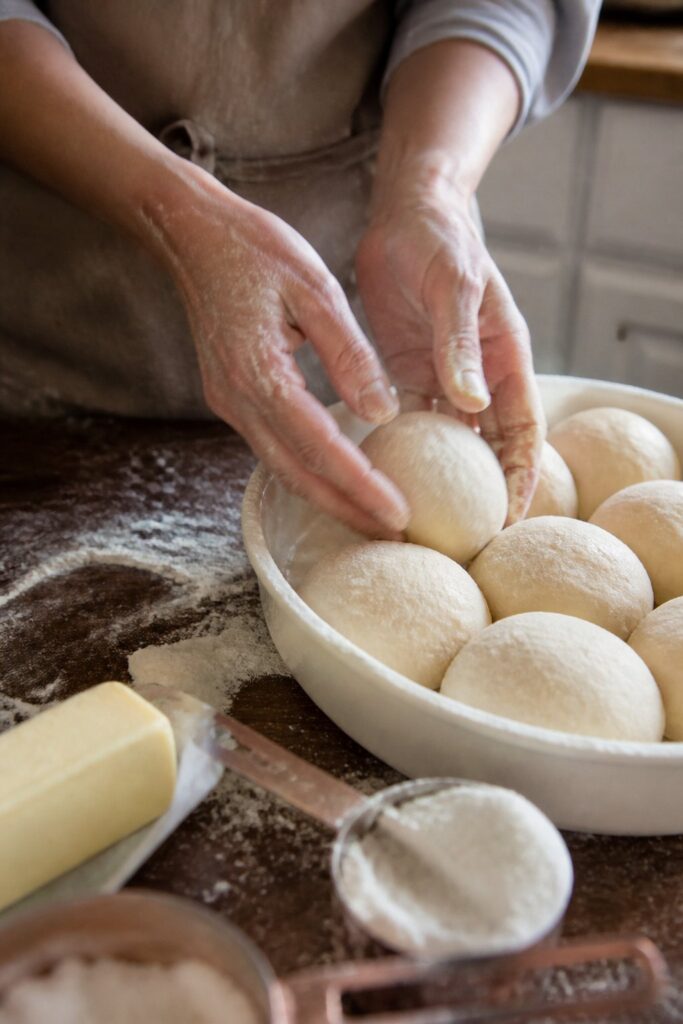
Step 6: Shape the Rolls
Punch the dough down gently.
Divide into 12 equal pieces.
Roll each piece into a ball shape.
Place them into a greased baking dish or onto a baking sheet.
Don’t worry if they aren’t perfectly shaped.
Homemade rolls honestly look better a little uneven.
Step 7: Second Rise
Cover the shaped rolls loosely with a kitchen towel.
Let them rise for another 30 minutes.
The rolls should look puffier and slightly touching each other.
This second rise makes a big difference in softness.
Step 8: Bake the Rolls
Preheat your oven to 375 degrees Fahrenheit.
Bake the rolls for about 16 to 18 minutes.
The tops should turn lightly golden brown.
Your kitchen will smell like buttery bakery bread at this point.
If the tops brown too quickly, loosely cover with foil during the final few minutes.
Step 9: Brush with Butter
As soon as the rolls come out of the oven, brush the tops with melted butter.
This keeps the tops soft and adds extra flavor.
I accidentally skipped this once and the tops dried out faster.
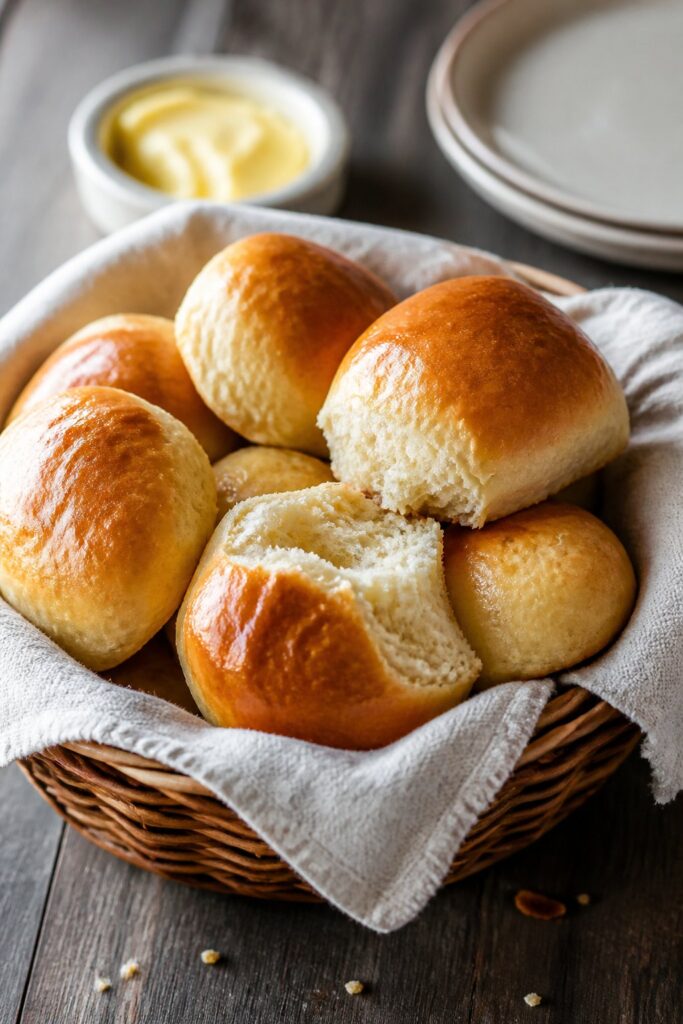
Step 10: Serve Warm
Let the rolls cool for about 5 minutes before serving.
The inside should feel fluffy and soft when pulled apart.
Honestly, these barely last long enough to cool completely in my house.
Common Mistakes to Avoid
Using Hot Milk
Milk that’s too hot can kill the yeast.
Adding Too Much Flour
Too much flour creates dense dry rolls.
Skipping the Second Rise
The rolls won’t turn out as fluffy.
Overbaking
The tops can dry out quickly.
Using Expired Yeast
If the yeast doesn’t foam during activation, start over.
Pro Tips
- Warm ingredients help dough rise better.
- Use bread flour for softer texture.
- Let the dough rise fully before shaping.
- Brush butter on immediately after baking.
- Don’t overcrowd the baking pan.
- Serve warm for the best texture.
What worked better for me was lightly greasing my hands while shaping instead of adding extra flour.
Variations
Honey Butter Rolls
Serve with homemade honey butter.
Garlic Rolls
Brush with garlic butter after baking.
Rosemary Rolls
Add chopped rosemary into the dough.
Cheddar Rolls
Mix shredded cheddar cheese into the dough.
Sweet Dinner Rolls
Add an extra tablespoon of sugar for slightly sweeter rolls.
The cheddar version disappeared ridiculously fast during football season.
Serving Ideas
This Ozzie Rolls Recipe goes with almost any comfort food meal.
Some favorites include:
- Pot roast
- Fried chicken
- Vegetable soup
- Chili
- Roast turkey
- Spaghetti
- BBQ chicken
- Ham dinners
- Chicken noodle soup
I also use leftovers for mini sandwiches the next day.
Make-Ahead Tips
These rolls are surprisingly easy to prep ahead.
- Prepare the dough the night before.
- Refrigerate after the first rise.
- Shape rolls the next day before baking.
- Let chilled dough warm slightly before baking.
What worked better for me was covering the dough tightly overnight so it didn’t dry out.

Storage & Reheating Tips
Room Temperature Storage
Store rolls in an airtight container for up to 3 days.
Refrigerator Storage
They can be refrigerated, but the texture stays softer at room temperature.
Freezing
Freeze baked rolls for up to 2 months.
I usually freeze extra rolls in zip-top freezer bags.
Reheating in the Oven
Warm at 300 degrees Fahrenheit for about 6 minutes.
Microwave Reheating
Microwave for about 10 to 15 seconds for softer texture.
FAQs
What makes Ozzie Rolls Recipe so soft?
Warm milk, butter, and proper rising time help create soft fluffy rolls.
Can I use all-purpose flour instead of bread flour?
Yes, but bread flour gives slightly better texture.
Why didn’t my rolls rise?
Usually the yeast was expired or the liquid was too hot.
Can I freeze homemade rolls?
Absolutely. Let them cool completely before freezing.
Can I make the dough ahead of time?
Yes. Refrigerating the dough overnight works well.
How do I keep dinner rolls soft?
Brush with butter after baking and store covered.
More Helpful Tips From My Kitchen
Over time, I picked up a few tricks.
One thing I noticed is that slightly sticky dough usually makes softer rolls than very dry dough.
Another thing is oven placement. Baking the rolls on the center rack helps them cook evenly.
I also learned not to rush the rising process. The first time I tried speeding things up, the rolls turned out heavier.
If your kitchen is cold, turning the oven light on nearby helps create a warmer rising spot.
Best Occasions for This Recipe
This Ozzie Rolls Recipe works for all kinds of meals and gatherings.
I usually make them for:
- Holiday dinners
- Sunday family meals
- Potluck dinners
- Thanksgiving
- Soup nights
- BBQ dinners
- Comfort food meals
- Weekend baking days
Honestly, homemade rolls make regular weeknight dinners feel more special.
Ingredient Swaps You Can Try
If you need substitutions, these work well.
- Use all-purpose flour instead of bread flour.
- Swap honey for sugar.
- Replace whole milk with 2% milk.
- Use salted butter if needed.
- Add herbs for extra flavor.
The recipe is pretty forgiving overall.
How to Serve for Parties
For gatherings, I usually place the rolls in a bread basket lined with a kitchen towel.
That helps keep them warm longer.
You can also serve them with:
- Honey butter
- Garlic butter
- Jam
- Cinnamon butter
- Herb butter
People always reach for the warmest rolls first.
Flavor Profile
These rolls taste buttery, soft, slightly sweet, and comforting.
The outside stays lightly golden while the inside stays fluffy.
The butter brushed on top gives them a rich bakery-style flavor.
I noticed the flavor gets even better with honey butter.
Tips for Fluffier Rolls
If you want extra fluffy rolls:
- Don’t add too much flour.
- Let the dough rise fully.
- Knead until smooth.
- Use fresh yeast.
- Bake just until golden.
The second rise makes a huge difference.
Kid-Friendly Version
Kids usually love these because they’re soft and slightly sweet.
Sometimes I make smaller rolls for little hands.
My nephew likes pulling them apart and dipping them into gravy.
Pairing Ideas
This Ozzie Rolls Recipe pairs especially well with warm comfort foods.
Some combinations I really liked:
- Rolls with chili
- Rolls with roast beef
- Rolls with chicken soup
- Rolls with turkey dinners
- Rolls with pot roast
The soft texture works especially well with rich sauces and soups.
Nutrition Notes
These rolls definitely fall into comfort food territory.
If you want to lighten them slightly:
- Use reduced butter.
- Make smaller rolls.
- Use lower-fat milk.
- Skip extra butter topping.
I tried making them once with very low-fat ingredients and honestly the texture just wasn’t the same.
Final Thoughts
This Ozzie Rolls Recipe became one of those dependable homemade bread recipes I keep coming back to.
They’re soft, buttery, comforting, and honestly much easier than people expect.
What worked better for me was focusing less on making perfect-looking rolls and more on keeping the dough soft.
Homemade bread should feel homemade.
If you try this recipe, definitely serve the rolls warm with butter because that’s when they taste best.
And maybe make extra because leftover rolls somehow disappear overnight around here every single time.
Ozzie Rolls Recipe
Equipment
- Large mixing bowl
- Measuring cups
- Measuring spoons
- Wooden spoon or spatula
- Baking dish or baking sheet
- Pastry brush
- Clean kitchen towel
- Knife or dough scraper
- Small saucepan or microwave-safe bowl
Ingredients
- 1 cup whole milk
- 1/4 cup warm water
- 2 1/4 teaspoons active dry yeast
- 1/4 cup granulated sugar
- 1/4 cup unsalted butter melted
- 1 teaspoon salt
- 1 large egg
- 3 1/2 to 4 cups bread flour
- 2 tablespoons melted butter for brushing tops
Optional Additions
- Honey butter
- Garlic butter topping
- Flaky sea salt
- Fresh rosemary
Instructions
Step 1: Activate the Yeast
- Warm the milk slightly until it feels warm but not hot.
- In a large mixing bowl, combine the warm water, yeast, and sugar.
- Let it sit for about 5 to 10 minutes.
- The mixture should look foamy on top.
- If nothing happens, the yeast may be expired.
- The first time I made this Ozzie Rolls Recipe, my milk was too hot and completely killed the yeast.
Step 2: Add Wet Ingredients
- Stir the warm milk, melted butter, egg, and salt into the yeast mixture.
- Mix until everything looks combined.
- The mixture should smell slightly sweet and buttery.
Step 3: Add the Flour
- Start adding the bread flour one cup at a time.
- Stir after each addition.
- Once the dough becomes too thick for a spoon, use your hands.
- The dough should feel soft and slightly tacky but not sticky enough to coat your fingers heavily.
- I noticed adding flour slowly prevents the dough from becoming too dry.
Step 4: Knead the Dough
- Transfer the dough onto a lightly floured surface.
- Knead for about 8 minutes.
- The dough should become smoother and more elastic.
- If it sticks too much, sprinkle a tiny bit more flour.
- Try not to overload the dough with flour because dense rolls are disappointing.
Step 5: First Rise
- Place the dough into a lightly greased bowl.
- Cover with a clean kitchen towel.
- Let it rise in a warm spot for about 1 hour or until doubled in size.
- I usually place mine near the stove if the kitchen feels chilly.
- The dough should look puffed up and soft.
Step 6: Shape the Rolls
- Punch the dough down gently.
- Divide into 12 equal pieces.
- Roll each piece into a ball shape.
- Place them into a greased baking dish or onto a baking sheet.
- Don’t worry if they aren’t perfectly shaped.
- Homemade rolls honestly look better a little uneven.
Step 7: Second Rise
- Cover the shaped rolls loosely with a kitchen towel.
- Let them rise for another 30 minutes.
- The rolls should look puffier and slightly touching each other.
- This second rise makes a big difference in softness.
Step 8: Bake the Rolls
- Preheat your oven to 375 degrees Fahrenheit.
- Bake the rolls for about 16 to 18 minutes.
- The tops should turn lightly golden brown.
- Your kitchen will smell like buttery bakery bread at this point.
- If the tops brown too quickly, loosely cover with foil during the final few minutes.
Step 9: Brush with Butter
- As soon as the rolls come out of the oven, brush the tops with melted butter.
- This keeps the tops soft and adds extra flavor.
- I accidentally skipped this once and the tops dried out faster.
Step 10: Serve Warm
- Let the rolls cool for about 5 minutes before serving.
- The inside should feel fluffy and soft when pulled apart.
- Honestly, these barely last long enough to cool completely in my house.
Notes
- Warm ingredients help dough rise better.
- Use bread flour for softer texture.
- Let the dough rise fully before shaping.
- Brush butter on immediately after baking.
- Don’t overcrowd the baking pan.
- Serve warm for the best texture.