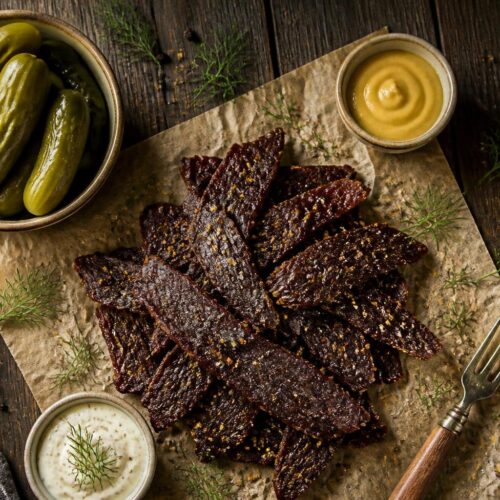
Dill Pickle Jerky Recipe
This Dill Pickle Jerky Recipe is loaded with pickle flavor, lean beef, garlic, and dill for a chewy homemade snack that’s hard to stop eating.
Equipment
- Sharp knife
- Cutting board
- Mixing bowl
- Measuring cups and spoons
- Large zip-top bag or food storage container
- Baking sheet
- Wire rack
- Parchment paper
- Tongs
- Paper towels
- Oven or dehydrator
- Spoon or spatula
Ingredients
- 2 pounds lean beef eye of round or top round
- 1 1/2 cups dill pickle juice
- 2 tablespoons chopped dill pickles
- 2 tablespoons soy sauce
- 1 tablespoon Worcestershire sauce
- 1 tablespoon brown sugar
- 1 teaspoon garlic powder
- 1 teaspoon onion powder
- 1 teaspoon black pepper
- 1 teaspoon dried dill
- 1/2 teaspoon smoked paprika
- 1/4 teaspoon red pepper flakes
- 1 teaspoon curing salt optional but recommended for food safety
Instructions
Step 1: Slice the Beef
- Put the beef in the freezer for about 45 minutes before slicing. This helps firm it up so it’s easier to cut thin pieces. I learned this after fighting with floppy raw meat on my cutting board more than once.
- Using a sharp knife, slice the beef into thin strips about 1/8 to 1/4 inch thick. If you want chewier jerky, slice with the grain. For softer jerky, slice against the grain.
- Try to keep the slices close in size so they dry evenly. Some unevenness is normal though. Mine never look perfectly identical.
Step 2: Make the Marinade
- In a large mixing bowl, combine the dill pickle juice, chopped pickles, soy sauce, Worcestershire sauce, brown sugar, garlic powder, onion powder, black pepper, dried dill, smoked paprika, red pepper flakes, and curing salt if using.
- Stir everything together until the sugar dissolves. The smell at this point is strong and very pickle-heavy, but once it dries, it mellows out nicely.
Step 3: Marinate the Beef
- Add the sliced beef into the marinade and toss everything together until coated well.
- Transfer the meat and marinade into a zip-top bag or covered container. Refrigerate for 8 to 12 hours.
- I usually flip the bag a couple times before bed and again in the morning so all the pieces soak evenly. The first time I made this dill pickle jerky recipe, I skipped that step and some pieces had way more flavor than others.
Step 4: Prepare for Drying
- Remove the beef strips from the marinade and lay them on paper towels.
- Pat the pieces dry gently. Don’t rinse them. You just want to remove extra moisture so the jerky dries better instead of steaming.
- Line a baking sheet with parchment paper and place a wire rack on top. Arrange the beef strips in a single layer with a little space between each piece.
- If you’re using a dehydrator, place the strips directly onto the trays.
Step 5: Dry the Jerky
For oven method:
- Set the oven to 175°F. Prop the oven door open slightly using a wooden spoon if your oven traps moisture.
- Dry the jerky for about 3 1/2 to 4 1/2 hours. Flip the pieces halfway through.
- The jerky is ready when it bends without snapping completely and the surface looks dry but still slightly flexible.
For dehydrator method:
- Set the dehydrator to 160°F and dry for about 4 to 6 hours depending on thickness.
- I noticed thinner pieces finish way faster than thicker ones, so start checking early instead of assuming they all need the same time.
Step 6: Cool Before Storing
- Let the jerky cool completely before storing it.
- This part matters more than people think. If you seal warm jerky in a container, condensation forms and the texture gets weird pretty fast.
- Once cooled, store in an airtight container or zip-top bag.
Notes
- Freeze the beef slightly before slicing for cleaner cuts.
- Add a little extra black pepper if you like stronger savory flavor.
- Use low-sodium pickle juice if your pickles are extra salty.
- Rotate trays during drying if your oven heats unevenly.
- Store small portions separately so you’re not opening the whole batch constantly.
- Taste one piece before drying is finished to judge seasoning.