Personal Introduction
The first time I tried making a homemade Maple Nut Goodies Recipe, I was mostly doing it for nostalgia. My dad used to keep those little maple nut candies hidden in the freezer when I was growing up, and somehow he thought nobody knew where they were. We definitely knew.
I honestly didn’t expect homemade candy to turn out this good. Candy recipes can feel a little intimidating because one minute everything looks fine and the next minute you’ve got burnt sugar glued to a saucepan. That actually happened to me during my first attempt.
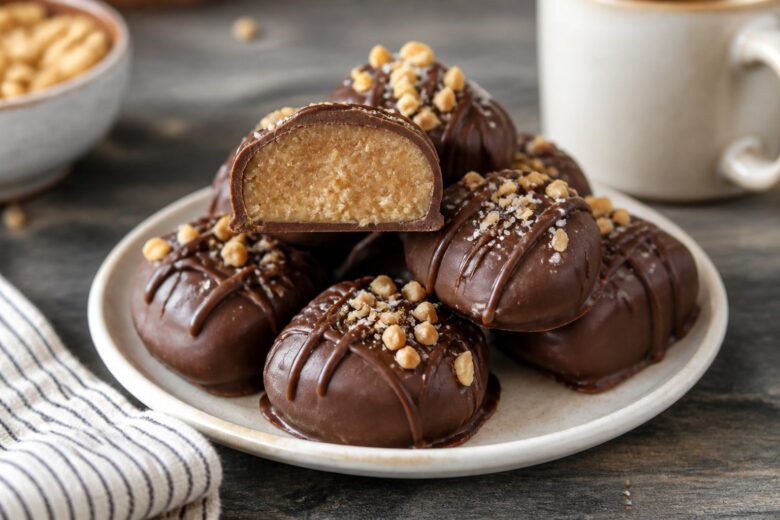
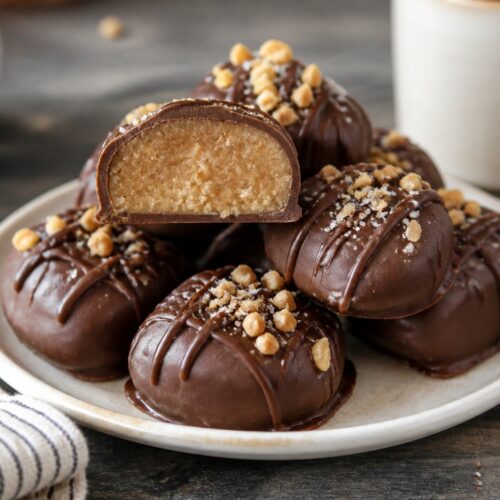
After a few small tweaks though, this version became one of my favorite homemade treats. The maple flavor tastes richer than store-bought candy, the peanuts stay crunchy, and the chocolate coating balances the sweetness really nicely.
What I like about this Maple Nut Goodies Recipe is that it feels homemade in the best way. The candies aren’t perfectly shaped, the chocolate coating ends up slightly uneven sometimes, and honestly that makes them look more real and inviting.
I noticed people always assume these took way more effort than they actually do.
Why This Recipe Works
There are a few simple reasons this candy recipe works well.
- Real maple syrup gives deeper flavor than artificial maple flavoring alone.
- Roasted peanuts balance the sweetness.
- Semi-sweet chocolate keeps the candy from tasting overly sugary.
- Butter helps create a softer candy center.
- Chilling the filling before dipping makes the chocolate coating easier.
- A little salt brings out the maple flavor.
What worked better for me was using roasted salted peanuts instead of unsalted. The salty-sweet combination tastes more balanced.
This Maple Nut Goodies Recipe also works because it doesn’t require fancy candy thermometers or complicated techniques.
Equipment Needed
You probably already have most of these tools at home.
- Medium saucepan
- Mixing bowl
- Spoon or spatula
- Baking sheet or tray
- Parchment paper
- Knife
- Cutting board
- Microwave-safe bowl
- Fork or dipping tool
- Measuring cups
- Measuring spoons
The first time I skipped parchment paper and seriously regretted it later.
Recipe Card
Maple Nut Goodies Recipe Summary
- Prep Time: 25 minutes
- Cook Time: 10 minutes
- Chill Time: 45 minutes
- Total Time: 1 hour 20 minutes
- Servings: 24 candies
- Cuisine: American
- Course: Dessert
- Calories: Approximately 190 calories per candy
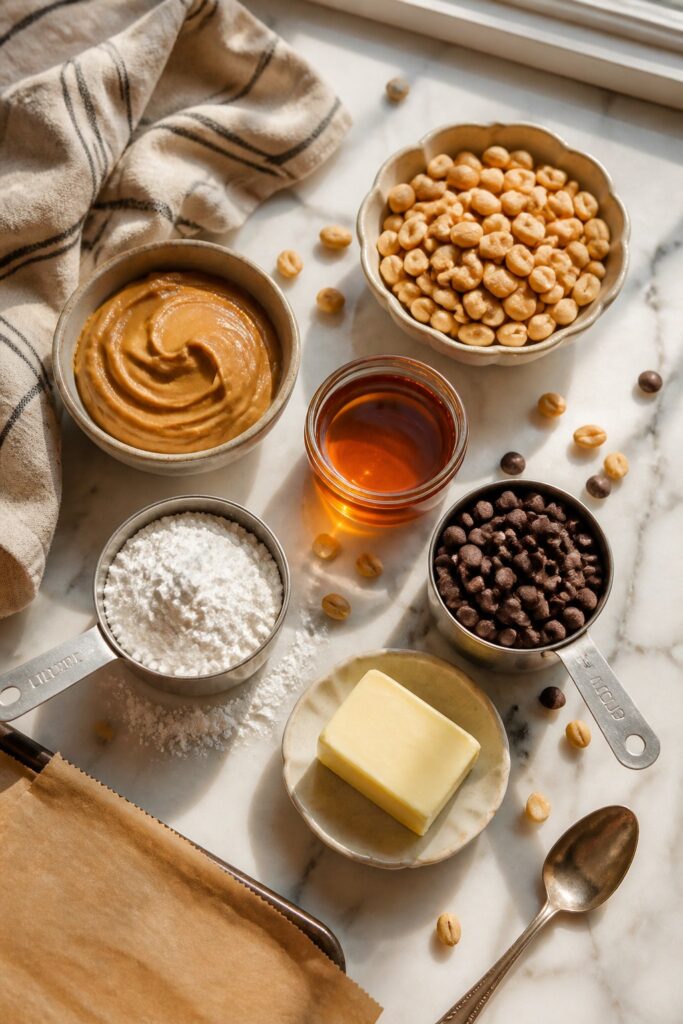
Ingredients
Maple Peanut Filling
- 2 cups roasted salted peanuts
- 1/2 cup creamy peanut butter
- 1/4 cup real maple syrup
- 2 tablespoons unsalted butter
- 1 teaspoon maple extract
- 1 cup powdered sugar
- 1/4 teaspoon salt
Chocolate Coating
- 2 cups semi-sweet chocolate chips
- 1 tablespoon coconut oil or shortening
Optional Toppings
- Crushed peanuts
- Flaky sea salt
- Extra melted chocolate drizzle
Step-by-Step Instructions
Step 1: Prepare the Tray
Line a baking sheet or tray with parchment paper.
Make sure you clear some refrigerator space beforehand because the candies need chilling later.
I forgot this once and ended up balancing a tray on top of leftover pizza boxes.
Step 2: Make the Maple Filling
In a medium saucepan over low heat, combine the peanut butter, maple syrup, butter, maple extract, and salt.
Stir slowly until everything melts together into a smooth mixture.
The smell at this point is honestly amazing. You’ll notice the maple scent gets stronger after the butter melts.
Don’t rush this part with high heat because maple syrup can scorch pretty quickly.
Step 3: Add the Powdered Sugar
Remove the saucepan from the heat.
Slowly stir in the powdered sugar until the mixture thickens.
It should look soft but still scoopable.
If the mixture feels too sticky, add another tablespoon or two of powdered sugar.
The first time I made this Maple Nut Goodies Recipe, I skipped this adjustment and the filling stayed way too soft for shaping.
Step 4: Add the Peanuts
Fold the roasted peanuts into the maple mixture.
Stir until the peanuts are fully coated.
The mixture should feel chunky and thick.
Some peanuts may stick out a little and that’s totally fine. Homemade candy honestly looks better slightly imperfect.
Step 5: Shape the Candies
Scoop small portions of the mixture and shape them into rough oval or rectangular candy shapes.
Place them onto the parchment-lined tray.
Don’t stress about making every piece identical.
I noticed slightly uneven candies actually look more homemade and realistic.
Step 6: Chill the Filling
Place the tray into the refrigerator for about 45 minutes.
The filling should feel firm enough to handle without sticking heavily to your fingers.
If your kitchen runs warm, you may need closer to an hour.
Step 7: Melt the Chocolate
In a microwave-safe bowl, combine the chocolate chips and coconut oil.
Microwave in 20-second intervals, stirring after each round until smooth.
Don’t microwave too long at once or the chocolate can turn grainy.
The first time I melted chocolate for candy, I absolutely scorched it because I walked away “for just a second.”
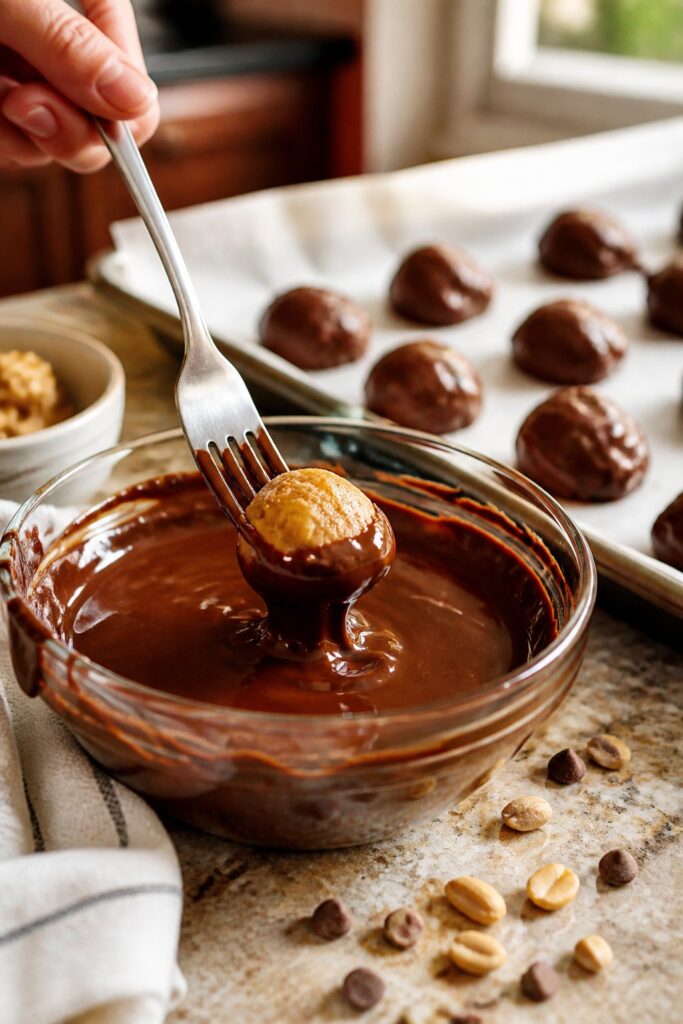
Step 8: Dip the Candies
Using a fork or dipping tool, lower each chilled candy into the melted chocolate.
Coat fully, then lift it out and gently tap the fork against the bowl to remove extra chocolate.
Place the coated candies back onto the parchment paper.
Some chocolate pooling underneath is normal.
Step 9: Add Toppings
Before the chocolate sets, sprinkle with crushed peanuts or flaky sea salt if using.
The salt really helps balance the sweetness.
Step 10: Chill Again
Refrigerate the candies for another 15 to 20 minutes until the chocolate firms up completely.
The chocolate should look slightly glossy but firm to the touch.
Common Mistakes to Avoid
Overheating the Maple Mixture
High heat can burn the maple syrup and create bitter flavor.
Skipping Chill Time
Warm filling is hard to dip cleanly in chocolate.
Overheating Chocolate
Chocolate burns surprisingly fast in the microwave.
Using Unsalted Peanuts Only
The candy can taste too sweet without a little salt balance.
Making the Filling Too Soft
If the filling won’t hold shape, add a little extra powdered sugar.
Pro Tips
- Use real maple syrup for the best flavor.
- Chill the filling thoroughly before dipping.
- Use roasted peanuts for extra crunch.
- Add flaky salt for better sweet-salty balance.
- Store candies chilled during warmer months.
- Dip candies quickly so the filling stays firm.
What worked better for me was using a fork instead of expensive candy dipping tools.
Variations
Dark Chocolate Version
Use dark chocolate chips instead of semi-sweet.
Crunchy Peanut Version
Swap creamy peanut butter for crunchy peanut butter.
Almond Maple Candy
Use roasted almonds instead of peanuts.
White Chocolate Maple Goodies
Coat the candies in white chocolate for a sweeter version.
Maple Pecan Version
Replace peanuts with toasted pecans.
The pecan version tastes especially good around the holidays.
Serving Ideas
This Maple Nut Goodies Recipe works well for snacks, desserts, and homemade gifts.
Some ways I like serving them:
- Holiday cookie trays
- Dessert platters
- Afternoon coffee snacks
- Game night treats
- Homemade gift boxes
- Movie night desserts
- Party snack tables
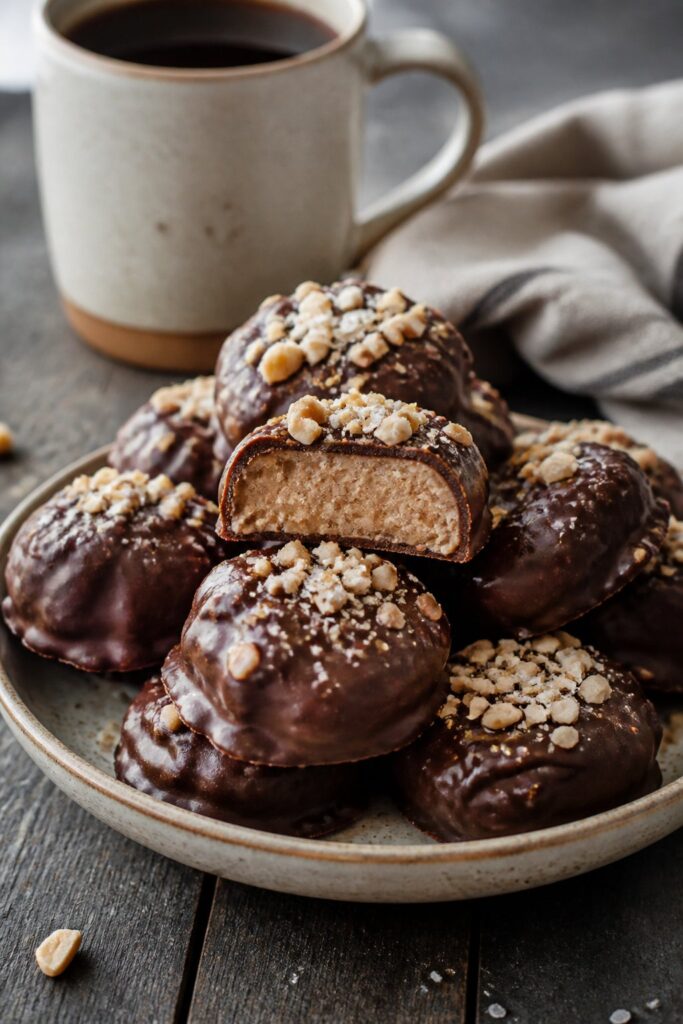
They also pair surprisingly well with black coffee.
Make-Ahead Tips
These candies are actually great for making ahead.
- Prepare the filling 1 day early.
- Chill shaped candies overnight before dipping.
- Store finished candies in airtight containers.
- Freeze extras for longer storage.
I noticed the maple flavor gets even better after sitting overnight.
Storage & Reheating Tips
Refrigerator Storage
Store the candies in an airtight container in the refrigerator for up to 2 weeks.
Freezer Storage
Freeze in layers separated by parchment paper for up to 2 months.
Room Temperature
They can sit out for a few hours during parties, but warmer kitchens may soften the chocolate.
Reheating
No reheating needed obviously, but if the chocolate gets dull from refrigeration, letting the candy sit at room temperature for 10 minutes improves the texture.
FAQs
What are Maple Nut Goodies made of?
Most versions include peanuts, maple flavor, peanut butter, chocolate, and sugar.
Can I use fake maple syrup?
You can, but real maple syrup gives much better flavor.
Why is my filling too soft?
Usually it needs more powdered sugar or longer chilling time.
Can I freeze homemade maple candy?
Yes. Freeze in airtight containers with parchment between layers.
What chocolate works best?
Semi-sweet chocolate balances the sweetness nicely.
Do I need a candy thermometer?
No, this recipe stays pretty simple and doesn’t require one.
More Helpful Tips From My Kitchen
Over time, I picked up a few little tricks.
One thing I noticed is that slightly wet hands help prevent sticking while shaping the candies.
Another thing is chocolate thickness. If the melted chocolate feels too thick for dipping, adding a tiny bit more coconut oil helps smooth it out.
I also learned not to overcrowd the refrigerator tray because the candies stick together surprisingly easily before the chocolate fully sets.
The first time I made these during summer, my kitchen got warm enough that the chocolate started softening while dipping. Now I work in smaller batches.
Best Occasions for This Recipe
This Maple Nut Goodies Recipe fits a lot of occasions.
I usually make them for:
- Christmas cookie trays
- Holiday parties
- Homemade food gifts
- Family movie nights
- Bake sales
- Potlucks
- Weekend dessert trays
- Game day snacks
Honestly, sometimes I just make them because I’m craving something sweet and salty.
Ingredient Swaps You Can Try
If you need substitutions, these work pretty well.
- Use almond butter instead of peanut butter.
- Replace peanuts with pecans.
- Use milk chocolate for sweeter candy.
- Swap maple extract with vanilla extract.
- Use dairy-free chocolate chips if needed.
The flavor changes slightly, but the recipe still works.
How to Serve for Parties
For gatherings, I usually place the candies in mini cupcake liners.
It keeps fingers cleaner and honestly makes them look a little nicer on dessert trays.
You can also pair them with:
- Brownies
- Chocolate cookies
- Coffee
- Hot cocoa
- Vanilla ice cream
People tend to grab these first from dessert tables because they’re easy to eat.
Flavor Profile
This candy tastes sweet, nutty, slightly salty, and rich with a smooth maple flavor.
The peanuts add crunch while the chocolate coating keeps the texture balanced.
The maple flavor stands out without tasting fake or overly sugary.
I noticed the flaky salt on top makes a surprisingly big difference.
Tips for Cleaner Chocolate Dipping
If you want smoother-looking candies:
- Chill the filling well.
- Use a fork to lift candies.
- Tap excess chocolate gently.
- Work with small batches.
- Let extra chocolate drip off before placing candies down.
Honestly though, slightly messy homemade candy looks more natural.
Kid-Friendly Version
Kids usually love these because they taste a little like peanut butter cups with maple flavor.
For younger kids, I sometimes make smaller bite-sized pieces.
My nephew likes adding extra crushed peanuts on top before the chocolate sets.
Pairing Ideas
This Maple Nut Goodies Recipe pairs especially well with warm drinks.
Some combinations I really liked:
- Maple candies with coffee
- Maple candies with hot chocolate
- Maple candies with vanilla ice cream
- Maple candies with chai tea
- Maple candies with cold milk
The sweet-salty flavor works really well with bitter coffee.
Nutrition Notes
These are definitely a treat, not health food.
Still, the peanuts add some protein and texture that makes the candy feel more satisfying.
If you want to adjust sweetness slightly:
- Use darker chocolate.
- Reduce powdered sugar a little.
- Add extra salted peanuts.
I tried using sugar-free chocolate once and honestly the texture wasn’t nearly as smooth.
Final Thoughts
This Maple Nut Goodies Recipe became one of those homemade treats that people ask about after the first bite.
They’re sweet, crunchy, chocolatey, slightly salty, and honestly pretty easy once you make them the first time.
What worked better for me was keeping the process simple instead of trying to make every candy look perfect.
Homemade candy should feel homemade.
If you try this recipe, definitely chill the filling long enough before dipping. That makes the biggest difference in getting clean chocolate coating.
And maybe hide a few pieces in the freezer before everyone else finds them. I learned that lesson pretty quickly.
Maple Nut Goodies Recipe
Equipment
- Medium saucepan
- Mixing bowl
- Spoon or spatula
- Baking sheet or tray
- Parchment paper
- Knife
- Cutting board
- Microwave-safe bowl
- Fork or dipping tool
- Measuring cups
- Measuring spoons
Ingredients
Maple Peanut Filling
- 2 cups roasted salted peanuts
- 1/2 cup creamy peanut butter
- 1/4 cup real maple syrup
- 2 tablespoons unsalted butter
- 1 teaspoon maple extract
- 1 cup powdered sugar
- 1/4 teaspoon salt
Chocolate Coating
- 2 cups semi-sweet chocolate chips
- 1 tablespoon coconut oil or shortening
Optional Toppings
- Crushed peanuts
- Flaky sea salt
- Extra melted chocolate drizzle
Instructions
Step 1: Prepare the Tray
- Line a baking sheet or tray with parchment paper.
- Make sure you clear some refrigerator space beforehand because the candies need chilling later.
- I forgot this once and ended up balancing a tray on top of leftover pizza boxes.
Step 2: Make the Maple Filling
- In a medium saucepan over low heat, combine the peanut butter, maple syrup, butter, maple extract, and salt.
- Stir slowly until everything melts together into a smooth mixture.
- The smell at this point is honestly amazing. You’ll notice the maple scent gets stronger after the butter melts.
- Don’t rush this part with high heat because maple syrup can scorch pretty quickly.
Step 3: Add the Powdered Sugar
- Remove the saucepan from the heat.
- Slowly stir in the powdered sugar until the mixture thickens.
- It should look soft but still scoopable.
- If the mixture feels too sticky, add another tablespoon or two of powdered sugar.
- The first time I made this Maple Nut Goodies Recipe, I skipped this adjustment and the filling stayed way too soft for shaping.
Step 4: Add the Peanuts
- Fold the roasted peanuts into the maple mixture.
- Stir until the peanuts are fully coated.
- The mixture should feel chunky and thick.
- Some peanuts may stick out a little and that’s totally fine. Homemade candy honestly looks better slightly imperfect.
Step 5: Shape the Candies
- Scoop small portions of the mixture and shape them into rough oval or rectangular candy shapes.
- Place them onto the parchment-lined tray.
- Don’t stress about making every piece identical.
- I noticed slightly uneven candies actually look more homemade and realistic.
Step 6: Chill the Filling
- Place the tray into the refrigerator for about 45 minutes.
- The filling should feel firm enough to handle without sticking heavily to your fingers.
- If your kitchen runs warm, you may need closer to an hour.
Step 7: Melt the Chocolate
- In a microwave-safe bowl, combine the chocolate chips and coconut oil.
- Microwave in 20-second intervals, stirring after each round until smooth.
- Don’t microwave too long at once or the chocolate can turn grainy.
- The first time I melted chocolate for candy, I absolutely scorched it because I walked away “for just a second.”
Step 8: Dip the Candies
- Using a fork or dipping tool, lower each chilled candy into the melted chocolate.
- Coat fully, then lift it out and gently tap the fork against the bowl to remove extra chocolate.
- Place the coated candies back onto the parchment paper.
- Some chocolate pooling underneath is normal.
Step 9: Add Toppings
- Before the chocolate sets, sprinkle with crushed peanuts or flaky sea salt if using.
- The salt really helps balance the sweetness.
Step 10: Chill Again
- Refrigerate the candies for another 15 to 20 minutes until the chocolate firms up completely.
- The chocolate should look slightly glossy but firm to the touch.
Notes
- Use real maple syrup for the best flavor.
- Chill the filling thoroughly before dipping.
- Use roasted peanuts for extra crunch.
- Add flaky salt for better sweet-salty balance.
- Store candies chilled during warmer months.
- Dip candies quickly so the filling stays firm.