Intro
I didn’t think dill pickle jerky would actually work the first time I tried it. I like pickles, I like beef jerky, but together? It sounded a little strange honestly. My brother kept talking about pickle-flavored snacks, and one weekend I figured I’d just mess around with a batch using some leftover eye of round from the freezer.
The first try was way too salty. I let the meat sit in pickle juice overnight and then added soy sauce without thinking it through. Big mistake. The texture was good, but wow, it felt like eating a salt lick. The second time though, I adjusted the marinade and added a little brown sugar to balance things out. That batch disappeared in two days.
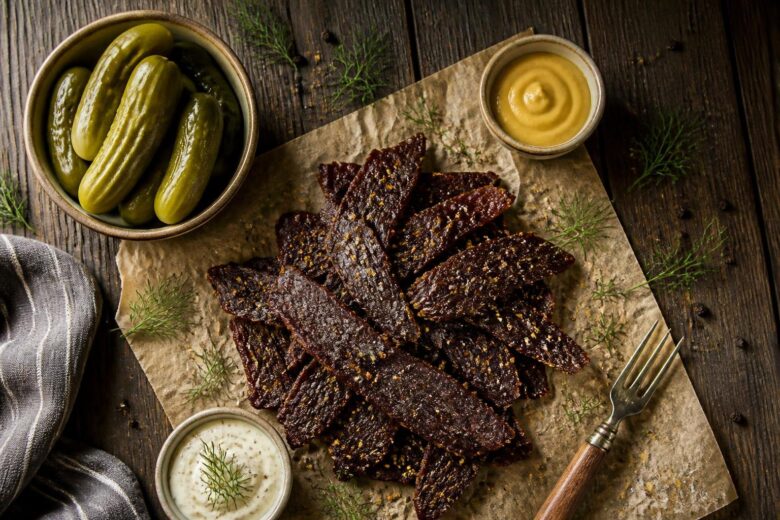
Now this dill pickle jerky recipe is one of the snacks I make when I know we’ll be driving somewhere long-distance or watching football all afternoon. It’s tangy, savory, a little garlicky, and honestly pretty addictive once you start eating it. I noticed people either look confused when you mention pickle jerky or they immediately want the recipe.
The best part is you don’t need fancy ingredients or professional equipment. If you’ve got an oven or dehydrator and some patience, you can make this at home without much stress.
Why This Recipe Works
There are a few reasons this dill pickle jerky recipe actually turns out really good instead of tasting gimmicky.
- The pickle juice helps tenderize the meat while adding that sharp dill flavor all the way through.
- Brown sugar balances the salt and vinegar so the jerky doesn’t taste harsh.
- Garlic powder and black pepper add depth without covering up the pickle flavor.
- Thin slices dry evenly and stay chewy instead of turning tough.
- Using lean beef keeps the jerky from getting greasy during drying.
What worked better for me was not over-marinating the beef. Around 8 to 12 hours gave the best flavor. One time I forgot it in the fridge for almost a full day and the texture got weirdly mushy around the edges.
Equipment Needed
You don’t need a bunch of expensive kitchen gadgets for this recipe. Here’s what I use at home:
- Sharp knife
- Cutting board
- Mixing bowl
- Measuring cups and spoons
- Large zip-top bag or food storage container
- Baking sheet
- Wire rack
- Parchment paper
- Tongs
- Paper towels
- Oven or dehydrator
- Spoon or spatula
If you have a dehydrator, great. If not, the oven works completely fine. I used the oven for years before finally getting a dehydrator during a holiday sale.
Recipe Card
Dill Pickle Jerky Recipe Summary
- Prep Time: 20 minutes
- Marinating Time: 10 hours
- Cook Time: 4 hours
- Total Time: 14 hours 20 minutes
- Servings: 8 servings
- Cuisine: American
- Course: Snack
- Calories: About 170 calories per serving
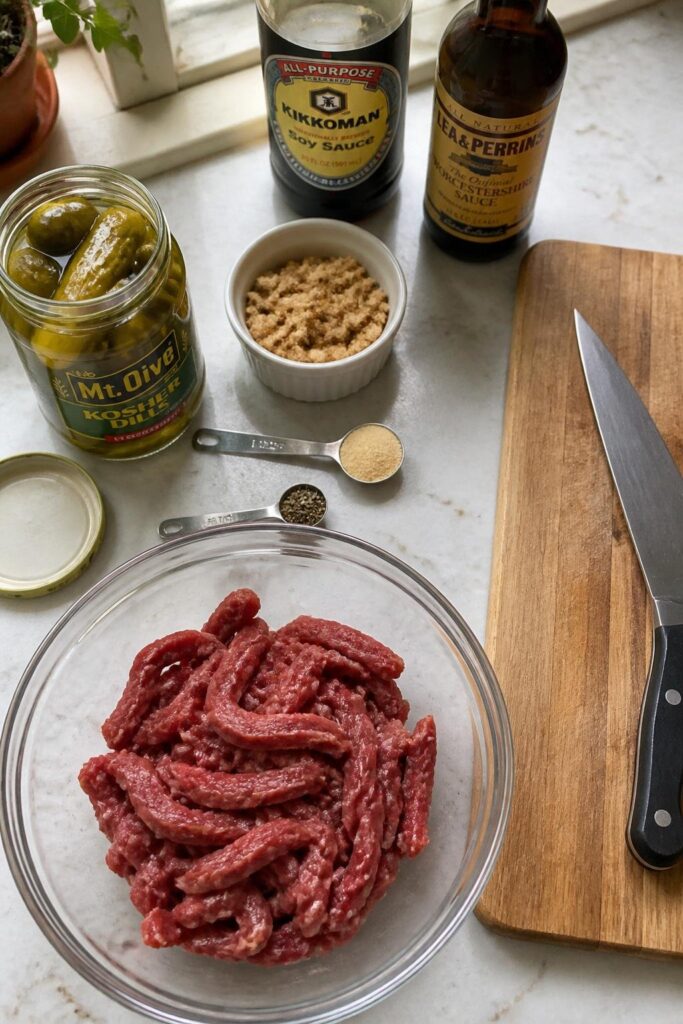
Ingredients
For this dill pickle jerky recipe, you’ll need:
- 2 pounds lean beef eye of round or top round
- 1 1/2 cups dill pickle juice
- 2 tablespoons chopped dill pickles
- 2 tablespoons soy sauce
- 1 tablespoon Worcestershire sauce
- 1 tablespoon brown sugar
- 1 teaspoon garlic powder
- 1 teaspoon onion powder
- 1 teaspoon black pepper
- 1 teaspoon dried dill
- 1/2 teaspoon smoked paprika
- 1/4 teaspoon red pepper flakes
- 1 teaspoon curing salt (optional but recommended for food safety)
Step-by-Step Instructions
Step 1: Slice the Beef
Put the beef in the freezer for about 45 minutes before slicing. This helps firm it up so it’s easier to cut thin pieces. I learned this after fighting with floppy raw meat on my cutting board more than once.
Using a sharp knife, slice the beef into thin strips about 1/8 to 1/4 inch thick. If you want chewier jerky, slice with the grain. For softer jerky, slice against the grain.
Try to keep the slices close in size so they dry evenly. Some unevenness is normal though. Mine never look perfectly identical.
Step 2: Make the Marinade
In a large mixing bowl, combine the dill pickle juice, chopped pickles, soy sauce, Worcestershire sauce, brown sugar, garlic powder, onion powder, black pepper, dried dill, smoked paprika, red pepper flakes, and curing salt if using.
Stir everything together until the sugar dissolves. The smell at this point is strong and very pickle-heavy, but once it dries, it mellows out nicely.
Step 3: Marinate the Beef
Add the sliced beef into the marinade and toss everything together until coated well.
Transfer the meat and marinade into a zip-top bag or covered container. Refrigerate for 8 to 12 hours.
I usually flip the bag a couple times before bed and again in the morning so all the pieces soak evenly. The first time I made this dill pickle jerky recipe, I skipped that step and some pieces had way more flavor than others.
Step 4: Prepare for Drying
Remove the beef strips from the marinade and lay them on paper towels.
Pat the pieces dry gently. Don’t rinse them. You just want to remove extra moisture so the jerky dries better instead of steaming.
Line a baking sheet with parchment paper and place a wire rack on top. Arrange the beef strips in a single layer with a little space between each piece.
If you’re using a dehydrator, place the strips directly onto the trays.
Step 5: Dry the Jerky
For oven method:
Set the oven to 175°F. Prop the oven door open slightly using a wooden spoon if your oven traps moisture.
Dry the jerky for about 3 1/2 to 4 1/2 hours. Flip the pieces halfway through.
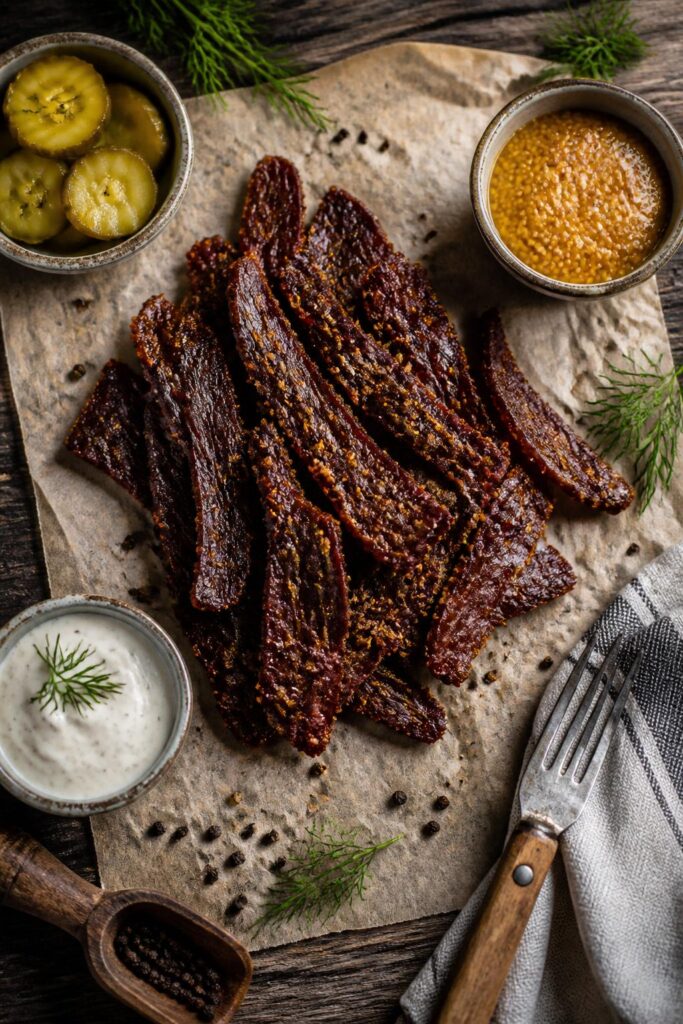
The jerky is ready when it bends without snapping completely and the surface looks dry but still slightly flexible.
For dehydrator method:
Set the dehydrator to 160°F and dry for about 4 to 6 hours depending on thickness.
I noticed thinner pieces finish way faster than thicker ones, so start checking early instead of assuming they all need the same time.
Step 6: Cool Before Storing
Let the jerky cool completely before storing it.
This part matters more than people think. If you seal warm jerky in a container, condensation forms and the texture gets weird pretty fast.
Once cooled, store in an airtight container or zip-top bag.
Common Mistakes to Avoid
Using Fatty Cuts of Beef
Fat doesn’t dry well and can make homemade jerky spoil faster. Stick with lean cuts like eye of round, top round, or sirloin.
Marinating Too Long
More time is not always better. Since pickle juice is acidic, leaving the meat too long can change the texture in a bad way.
Slicing Uneven Pieces
Thin pieces dry quickly while thick pieces stay soft in the middle. Try your best to keep things fairly even.
Not Patting the Meat Dry
Extra marinade makes the jerky take longer to dry and sometimes gives it a sticky outside texture.
Overdrying
The jerky keeps drying a little while cooling. The first time I made this, I left it in too long because I thought it still looked soft. After cooling, it turned almost crunchy.
Pro Tips
- Freeze the beef slightly before slicing for cleaner cuts.
- Add a little extra black pepper if you like stronger savory flavor.
- Use low-sodium pickle juice if your pickles are extra salty.
- Rotate trays during drying if your oven heats unevenly.
- Store small portions separately so you’re not opening the whole batch constantly.
- Taste one piece before drying is finished to judge seasoning.
One thing I started doing recently is adding a teaspoon of pickle brine powder if I have it around. Totally optional, but it boosts the tangy flavor even more.
Variations
Spicy Dill Pickle Jerky
Add 1 teaspoon cayenne pepper or a few dashes of hot sauce to the marinade.
Sweet and Tangy Version
Increase the brown sugar to 2 tablespoons for a slightly sweeter finish.
Turkey Dill Pickle Jerky
You can use sliced turkey breast instead of beef. It dries a bit faster, so watch the timing closely.
Garlic Dill Jerky
Double the garlic powder and add a little minced fresh garlic to the marinade.
Smoky Pickle Jerky
Add extra smoked paprika or a few drops of liquid smoke.
I tried liquid smoke once and accidentally added too much. The whole kitchen smelled like campfire for two days. A tiny amount goes a long way.
Serving Ideas
This dill pickle jerky recipe works really well as a snack on its own, but there are a few things I usually serve with it.
- Potato salad
- Pasta salad
- Cold dill pickle dip
- Ranch crackers
- Cheese cubes
- Pretzels
- Beer or sparkling water
- Iced tea
- Sandwich trays
We also throw it onto snack boards during football season with cheddar cubes and spicy mustard. It disappears surprisingly fast.
Make-Ahead Tips
You can slice and marinate the beef a day ahead if needed.
If you want to prep even earlier, freeze the sliced raw beef in marinade for up to 2 months. Thaw it overnight in the refrigerator before drying.
I noticed the flavor actually gets a little deeper after freezing in the marinade.
You can also make a double batch and vacuum seal smaller portions for road trips or lunches.
Storage & Reheating Tips
Homemade jerky stores pretty well if kept dry.
Room Temperature
Store in an airtight container for up to 1 week.
Refrigerator
Store for up to 3 weeks in a sealed container.
Freezer
Freeze for up to 3 months.
Reheating
You usually don’t need to reheat jerky, but if it gets overly firm from the fridge, let it sit at room temperature for about 15 minutes before eating.
If the jerky ever smells sour or feels damp, toss it.
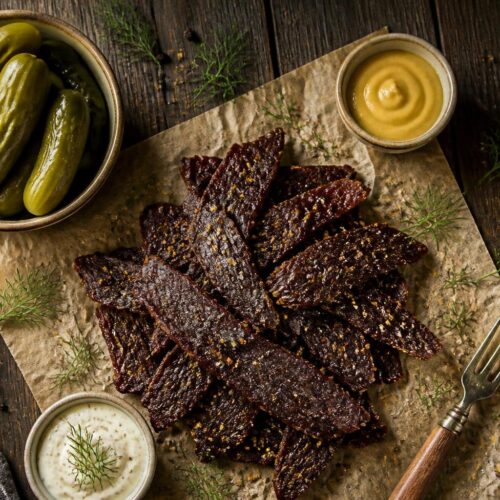
Dill Pickle Jerky Recipe
Equipment
- Sharp knife
- Cutting board
- Mixing bowl
- Measuring cups and spoons
- Large zip-top bag or food storage container
- Baking sheet
- Wire rack
- Parchment paper
- Tongs
- Paper towels
- Oven or dehydrator
- Spoon or spatula
Ingredients
- 2 pounds lean beef eye of round or top round
- 1 1/2 cups dill pickle juice
- 2 tablespoons chopped dill pickles
- 2 tablespoons soy sauce
- 1 tablespoon Worcestershire sauce
- 1 tablespoon brown sugar
- 1 teaspoon garlic powder
- 1 teaspoon onion powder
- 1 teaspoon black pepper
- 1 teaspoon dried dill
- 1/2 teaspoon smoked paprika
- 1/4 teaspoon red pepper flakes
- 1 teaspoon curing salt optional but recommended for food safety
Instructions
Step 1: Slice the Beef
- Put the beef in the freezer for about 45 minutes before slicing. This helps firm it up so it’s easier to cut thin pieces. I learned this after fighting with floppy raw meat on my cutting board more than once.
- Using a sharp knife, slice the beef into thin strips about 1/8 to 1/4 inch thick. If you want chewier jerky, slice with the grain. For softer jerky, slice against the grain.
- Try to keep the slices close in size so they dry evenly. Some unevenness is normal though. Mine never look perfectly identical.
Step 2: Make the Marinade
- In a large mixing bowl, combine the dill pickle juice, chopped pickles, soy sauce, Worcestershire sauce, brown sugar, garlic powder, onion powder, black pepper, dried dill, smoked paprika, red pepper flakes, and curing salt if using.
- Stir everything together until the sugar dissolves. The smell at this point is strong and very pickle-heavy, but once it dries, it mellows out nicely.
Step 3: Marinate the Beef
- Add the sliced beef into the marinade and toss everything together until coated well.
- Transfer the meat and marinade into a zip-top bag or covered container. Refrigerate for 8 to 12 hours.
- I usually flip the bag a couple times before bed and again in the morning so all the pieces soak evenly. The first time I made this dill pickle jerky recipe, I skipped that step and some pieces had way more flavor than others.
Step 4: Prepare for Drying
- Remove the beef strips from the marinade and lay them on paper towels.
- Pat the pieces dry gently. Don’t rinse them. You just want to remove extra moisture so the jerky dries better instead of steaming.
- Line a baking sheet with parchment paper and place a wire rack on top. Arrange the beef strips in a single layer with a little space between each piece.
- If you’re using a dehydrator, place the strips directly onto the trays.
Step 5: Dry the Jerky
For oven method:
- Set the oven to 175°F. Prop the oven door open slightly using a wooden spoon if your oven traps moisture.
- Dry the jerky for about 3 1/2 to 4 1/2 hours. Flip the pieces halfway through.
- The jerky is ready when it bends without snapping completely and the surface looks dry but still slightly flexible.
For dehydrator method:
- Set the dehydrator to 160°F and dry for about 4 to 6 hours depending on thickness.
- I noticed thinner pieces finish way faster than thicker ones, so start checking early instead of assuming they all need the same time.
Step 6: Cool Before Storing
- Let the jerky cool completely before storing it.
- This part matters more than people think. If you seal warm jerky in a container, condensation forms and the texture gets weird pretty fast.
- Once cooled, store in an airtight container or zip-top bag.
Notes
- Freeze the beef slightly before slicing for cleaner cuts.
- Add a little extra black pepper if you like stronger savory flavor.
- Use low-sodium pickle juice if your pickles are extra salty.
- Rotate trays during drying if your oven heats unevenly.
- Store small portions separately so you’re not opening the whole batch constantly.
- Taste one piece before drying is finished to judge seasoning.
FAQs
What cut of beef is best for dill pickle jerky recipe?
Eye of round is probably the best balance of lean, affordable, and easy to slice. Top round and bottom round also work well.
Can I make dill pickle jerky recipe without a dehydrator?
Yes. The oven method works great. I made it in the oven for years before getting a dehydrator.
Is curing salt necessary?
Not completely, but it helps with preservation and food safety. If you skip it, keep the jerky refrigerated.
Why is my jerky too salty?
Usually it comes from extra salty pickle juice or marinating too long. Low-sodium soy sauce can help too.
How do I know when jerky is done?
The jerky should bend without snapping fully in half. It should feel dry outside but still have some chew.
Can I use store-bought pickle juice?
Absolutely. I normally just use juice straight from a jar of dill pickles sitting in the fridge.
Read More: Pepper Belly Pete Mac and Cheese Recipe
More Helpful Notes From My Kitchen
One thing I learned after making this dill pickle jerky recipe several times is that different pickle brands really change the final flavor. Some pickle juices are heavy on garlic while others taste more vinegary or sweet.
Claussen juice gave me a brighter pickle flavor, while some shelf-stable brands tasted saltier and sharper. Neither was bad, just different.
Another thing worth mentioning is airflow. If you use the oven method, don’t crowd the pan. The meat needs room for air to move around or it dries unevenly.
I also rotate the baking sheet once or twice because my oven definitely has hot spots. The back right corner cooks faster every single time.
When I pack this jerky for road trips, I usually add a folded paper towel into the container. It helps absorb a little extra moisture if the weather is humid.
Why People Keep Making This Recipe Again
A lot of homemade jerky recipes taste mostly like soy sauce or black pepper. This one actually keeps the dill pickle flavor noticeable without going overboard.
The vinegar tang cuts through the richness of the beef, and the dill gives it that familiar deli-style pickle taste.
I noticed even people who were skeptical at first kept reaching for another piece.
It’s also easier than people think. Once the meat is sliced and marinated, most of the work is just waiting.
The smell while it dries is honestly amazing too. Kind of savory, garlicky, and slightly tangy.
A Few Ingredient Swaps That Work
If you’re missing a couple ingredients, there’s some flexibility here.
- Maple syrup can replace brown sugar.
- Coconut aminos work instead of soy sauce.
- Fresh dill can replace dried dill.
- Apple cider vinegar can add extra tang if your pickle juice tastes mild.
- Cracked pepper works instead of ground black pepper.
I once ran out of Worcestershire sauce halfway through making this dill pickle jerky recipe and used a little steak sauce instead. It actually turned out pretty decent.
Texture Tips
Texture is probably the trickiest part of homemade jerky.
If your jerky feels too soft, it probably needs another 30 to 45 minutes drying time.
If it snaps sharply when bent, it’s overdried.
Thicker cuts stay more tender while thinner slices turn chewier.
Personally, I like somewhere in the middle where it still bends but doesn’t feel wet.
The first few times you make jerky, you kind of learn by feel more than exact timing.
Best Pickles to Use
Classic dill pickles work best here.
Avoid sweet pickle juice unless you specifically want sweet jerky.
Kosher dill pickle juice gives the cleanest flavor in my opinion.
Spicy dill pickle juice is also really good if you want extra heat without adding more spices.
One batch I made using garlic dill pickles turned out especially good with sharp cheddar on the side.
Serving This at Parties
This dill pickle jerky recipe actually gets a lot of attention at parties because people usually haven’t tried anything like it.
I like serving it:
- On charcuterie boards
- In small snack cups
- Alongside burgers at cookouts
- During football watch parties
- Packed into road trip snack bags
Kids usually think it smells funny at first, then end up stealing pieces anyway.
Final Thoughts
This dill pickle jerky recipe started as a random experiment in my kitchen and turned into something I make pretty regularly now.
It’s salty, tangy, chewy, and honestly hard to stop eating once you get going.
The nice thing is you can tweak it pretty easily depending on how strong you want the pickle flavor or how spicy you like your jerky.
If you’ve never made homemade jerky before, this is actually a pretty forgiving place to start. Just keep an eye on drying time and don’t over-marinate the beef.
And if your first batch isn’t perfect, don’t worry too much. Mine definitely wasn’t.
Now whenever I make this dill pickle jerky recipe, I usually end up wishing I doubled the batch because it goes fast around here.